Transitions - the first exhibition by Etcetera

Hidden Message 13 I am very pleased to announce the first exhibition by Etcetera at the Platform Gallery in Clithero, UK between 12th and 27th September 2015!

Grafitti 1 by Helen Conway

Etcetera is a group of 7 textile artists (including me). The other members are Linda Bilsborrow, Julie Bunter, Helen Conway, Isobel Holland, Magie Relph and Sandra Wynam. We formed about two years ago with the specific intention of supporting and encouraging each other as we strive to develop as textile artists. An important part of that is exhibiting in 'white space' galleries alongside artists using other media. We are a diverse group so chose the broad theme of Transitions for our first exhibition. It has been interpreted in very different ways by the group members. I will be showing pieces from my Hidden Message series which are inspired by the cultural transition taking in place in China today.

You can find more about us on our website www.stitchetcetera.com

You can find more about the Platform Gallery at Platform Gallery

Address: Station Road, Clithero, BB7 2JT

Telephone: 01200 425566

Opening times: Monday to Friday 9am to 5pm, Saturday 10am to 4.30pm


leahhigginsComment
Happy Accidents

Printing with discharge paste then thickened dyes My day job involves quite a bit of travelling and there are periods when I have a series of trips week after week that keep me out of the studio. The month of March is one such period with two trips to Germany, one to China and one within the UK. And, of course, each trip requires some level of preparation further eating into studio time. So I came back from my week at Rydal Hall knowing that I should not expect to do anything in the studio for the next 4 - 5 weeks. I took the opportunity to put my sewing machine in for a service and had a good tidy up in the studio. And tried not to feel bereft!

But last Saturday I realized I could, if I was quick, squeeze in a bit of bench work so I decided to do some more experimenting with discharge. I had a lovely 2 hours laying down discharge paste first then over printing with thickened dyes. And the next morning I found time to iron then wash the pieces. I was getting a LOT of colour coming out of the fabric as I rinsed it. And then realized that I had printed onto fabric from my 'scoured' box rather than from my 'soda soaked' box! Oh boy, if I could have kicked myself I would! I quickly added soda and hot water to the rinse bucket in the hope of salvaging something. The results can best be described as pale and vaguely interesting.

Happy accident number 1: forgetting to use pre soda soaked fabric!

This is the first time I have ever made this mistake and I was really annoyed with myself so I stayed up late on Sunday evening repeating the work on pre-soda soaked fabric thinking that I could find enough time on Monday evening to iron off and rinse the pieces. But the day job intervened and it was Tuesday evening before I got back into the studio. I was horrified to find that the pieces of fabric had already started to discharge leaving areas of yellow, green and purple! I have had pieces discharge when I have hung them outside in the sun but I've this had happened with the fabric sat on the bench.

Fabric printed with discharge paste then thickened dye then left for 2 days during which the discharge process started

I ironed the fabrics until the fabric felt like cardboard but couldn't get the colours to change - I really thought that I had ruined yet more fabric. But I figured that I might as well rinse them out and was wonderfully surprised when all the 'nasty' colours washed away leaving a couple of really gorgeous pieces of fabric. I had used black and dark brown. In one piece (pictured above) I used full strength colours which have discharged to indigo and a dark sepia. And in the piece below I used medium strength colours which discharged to pale blue greys and beiges. In both pieces there is a lot more detail and texture than I have seen in my previous experiments. Could this be because I left them so long? Maybe. I'll have to do some more experimenting to find out.

Pale version using medium strength thickened dyes over discharge paste

Detail from pale piece

Detail from dark piece

leahhigginsComment
Retreat at Rydal Hall

Last week I spent a glorious 5 days in the company of 13 other members of the Contemporary Quilt Group at Rydal Hall in Ambleside in the Lake District. The group has been meeting for an annual retreat for several years now. There is a core of about 9 or 10 plus 'part-timers' like me who attend every couple of years. This year the group included Linda Bilsborrow, Janet Edgington, Julie Bunter, Ruth Axson, Pauline Stubbings, Linda Young, Judy Fairless, Jean Marshall, Karen Hurrell, Millie Thomas and Mags Ramsay. We were joined in the evenings by Gillian Travis and her friend Annie. The group has been using Rydal Hall for several years. It was chosen because many of the members wanted to spend their afternoons out walking. It is also well placed for lots of retail therapy with great art shops in Ambleside and neighbouring towns. I am not a walker and spent most of my time indoors stitching. I did venture out to the Rydal Hall Tea Rooms for lunch each day. A walk of maybe 20 metres! But well worth it for the soup, the cakes and the views of Rydal Brook which was running very fast thanks to heavy rain during the week.

Rydal Brook in full flow

The Hall itself is quiet and welcoming. The group rate gave us the use of the Old Kitchen which is a lovely, well lit room. Although it was a bit of a squeeze setting up work tables for 12 people! The photo below was taken early on Tuesday morning whilst the room still looked reasonably tidy. It didn't stay that way. Being a retreat meant we were all working on our own pieces at our own speeds. Some used the week to work into sketchbooks, others used the week to start new projects. The activities were really varied from machine quilting through to monoprinting. And all done in great company, sometimes quiet but many times accompanied by laughter. A great getaway from our daily lives.

The Old Kitchen set up ready for a days work

Although we worked on our own pieces most of the time we did stop each day for a group activity / talk. I gave a short talk on dyeing fabric using ferrous sulphate solution and tea. This is something I have tried several times with mixed levels of success but it can produce some wonderful results.

Fabric dipped in ferrous sulphate solution then in strong tea

Fabric dipped in strong tea solution then in ferrous sulphate solution

'Rust dyeing' seems to be an 'in' thing at the moment. Several of the ladies had participated in workshops with Alice Fox and others and brought some of their work to share with the group.

Work in progress by Pauline Stubbings

Work in progress by Ruth Axson

I spent my week working on the new Hidden Message pieces. It was good that I had got the composition of 3 pieces completed prior to the retreat. The lack of a design wall made it much more difficult to judge whether new compositions 'worked' or not.  It also made it difficult to gauge the success of the quilting. I returned home with 4 pieces completed and 1 in progress. They are currently pinned on my design wall and, overall, I am delighted with the outcome of the retreat.

Back to the real world tomorrow (unfortunately)!

leahhigginsComment
Building the next Hidden Message pieces

Having printed most of my fabrics I have now started to make the next Hidden Message pieces. I'm never quite sure what to call this process - I guess it could be called collage but the regularity of the pieces seems to fit better with the word 'construct'. And construct seems more appropriate given that I am building cityscapes. Whatever you call it I love this part of the process. For me it involves lots of sitting and looking at the design wall, lots of pinning and unpinning bits of fabric, drinking lots of coffee and eating too many biscuits! I spent about 8 hours constructing 3 pieces. Creating my skyscrapers

I fused acrylic felt to cotton backing fabric and cut out 3 pieces 14 x 32 inches (although the finished pieces will be 12 x 30 inches). I then started to make my skyscrapers using freezer paper as guides for ironing under edges.

Layering the skyscrapers to build a cityscape

I pin the pieces in place as I go and pin the whole piece to my design wall at regular intervals. What looks good on the bench doesn't always work when you try to look at the piece as a whole from a bit of a distance. I didn't really have a plan in terms of how I wanted to use the fabrics - the 3 pieces sort of evolved together. I have ended up with two paler 'day' pieces and one which feels more like a night scene. I plan on making more of these but will spend time quilting these first - stitch on these pieces will spark new ideas for the next pieces!

Cityscapes, one at night and two during the day

leahhigginsComment
Printing the next Hidden Message fabrics

So having sampled on similar coloured fabrics I spent the weekend using thermofax and screen printing to create a group of gorgeous fabrics ready for the next set of Hidden Message pieces. I started with a hand dyed 21 piece colour family. I used a single screen on some. Others I used a couple of screens. Some were discharged. Some were printed with screen printing inks. Some were over printed. I still have 7 pieces of fabric to print but I'm pretty happy with the results so far. Printed hand dyed colour family

Printing - marking out fabric with pins and thread so that I can see where to print

Printing - using kitchen towel to mask areas to stop 'ghosting'

Printing with discharge paste - activating with an iron

Printed fabrics drying in the studio

leahhiggins Comments
Sampling for the next Hidden Message pieces

I have completed 13 pieces in the Hidden Message series to date but none of them are quite right for an exhibition I have later this year with the Etcetera group. The venue is relatively small so we each only have limited wall space. I thought that the last two pieces I made would be OK but woke up one night realizing that their scale was just not going to work. So with only 8 months to go I decided that I needed to start from scratch and work smaller. I dyed some more fabric over the Christmas holidays - that was the easy bit. And then I started to think about layout and construction methods. I did spend a lot of time working in a sketchbook when I did City and Guilds but the habit never stuck. Instead most of my 'working out' happens in my head with the odd scribble on bits of paper. This time though I couldn't quite figure everything out so made a paper mock up of how I thought the piece could look. The series is all about censorship in modern China and takes its form from the skyscraper filled skyline in Shanghai. So I made a cityscape using cut up Chinese newspapers. No idea what any of the text meant but loved the texture.

Sampling Paper Skyscrapers (12 x 30 inches)

This told me that I needed some smaller scale prints than I had used in the earlier pieces so I had a series of thermofaxes made featuring barred windows and Chinese text. Although the text will read more as texture than clear text it does have meaning - it is a list of types of censorship used in China (and, unfortunately, in many other countries). I trialed these screens on a set of fabrics left over from an earlier Hidden Message dyeing session. I experimented with thickened dyes and with screenprinting inks to achieve different levels of clarity. I also used discharge paste on some pieces.

Printed and discharged fabrics

And then I started to build my skyscrapers. I stitched the first pieces around their 'exposed' edges then with parallel vertical quilting. Looked OK but lacked some movement? Maybe. So I switched to just stitching pieces down around their edges. Once the skyscrapers were built I hung it on my design wall and made a cup of tea. And sat and starred. And gave up for the night but when I got into my studio the next evening I knew that I wanted to add parallel diagonal lines - as if the stitch were rain pouring down on the city.

Printed and discharged fabrics collaged

I haven't completely quilted the piece. I don't need to. The sampling process has given me enough understanding to know how to print my fabrics and how to build the city. I am already thinking of different variations on colour placement and on adding stitch. And now I am ready to start work - I need to have 5 pieces (that I am happy with) by the end of August - easy!!

Stitched sample

leahhigginsComment
Story of my studio

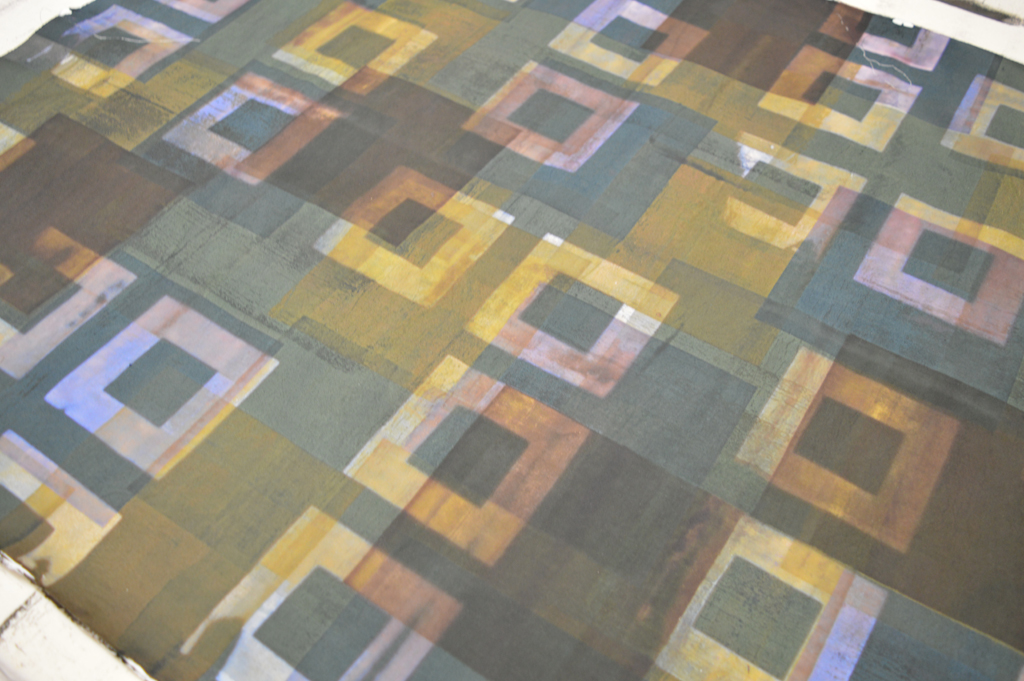
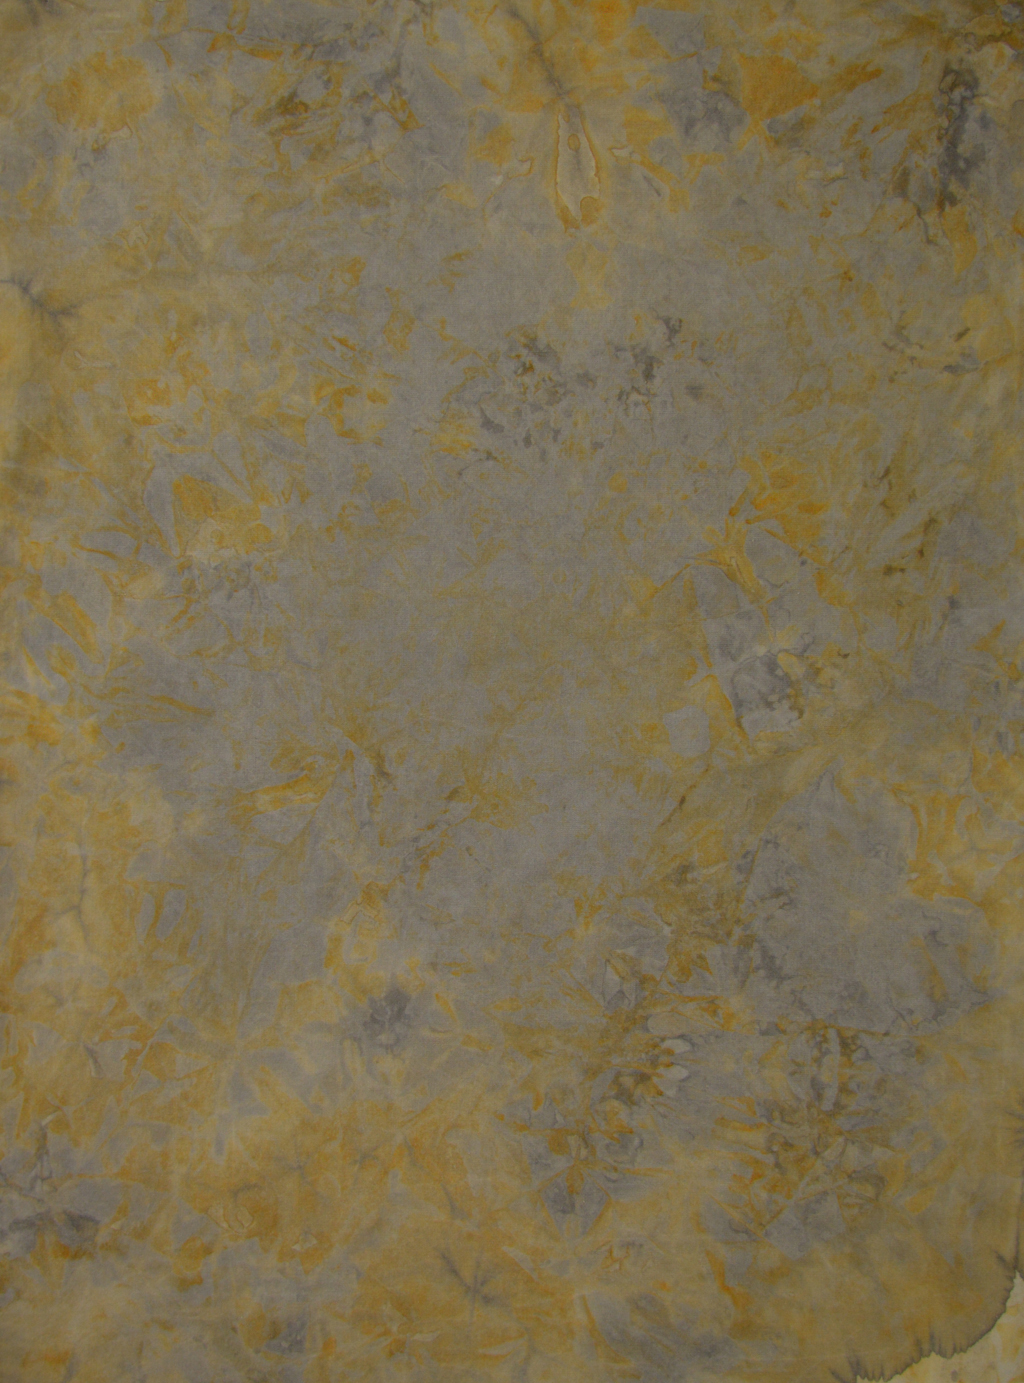
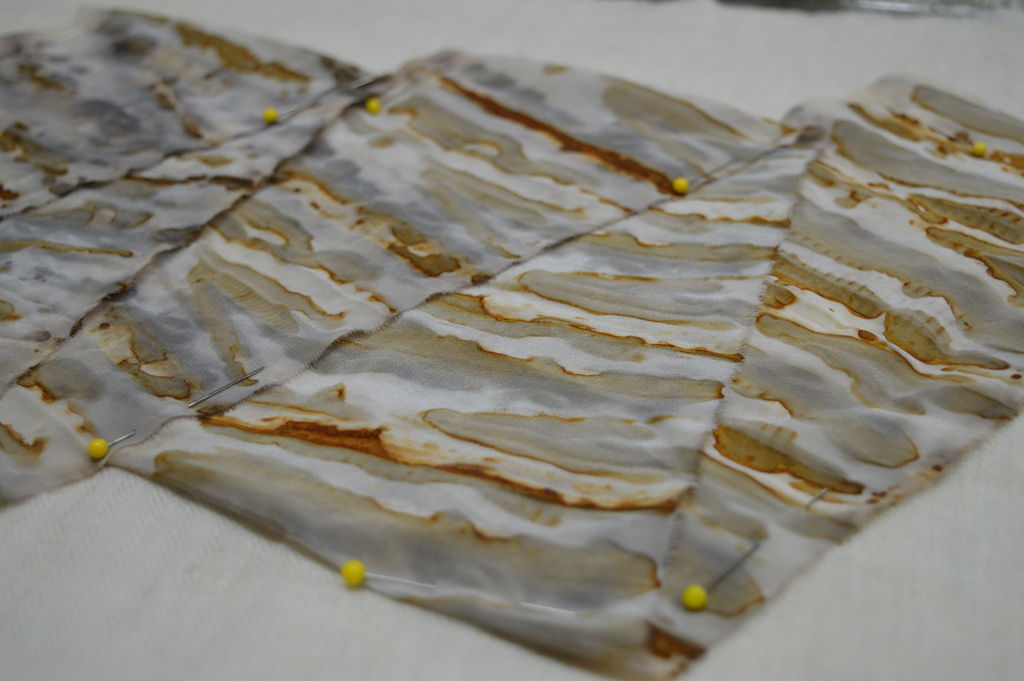
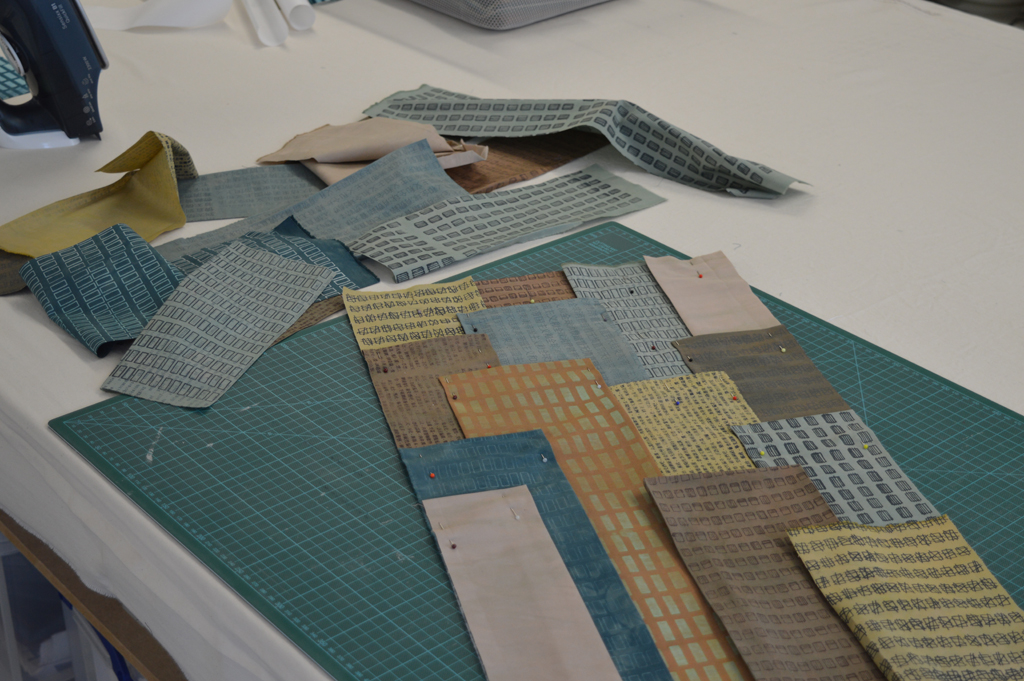
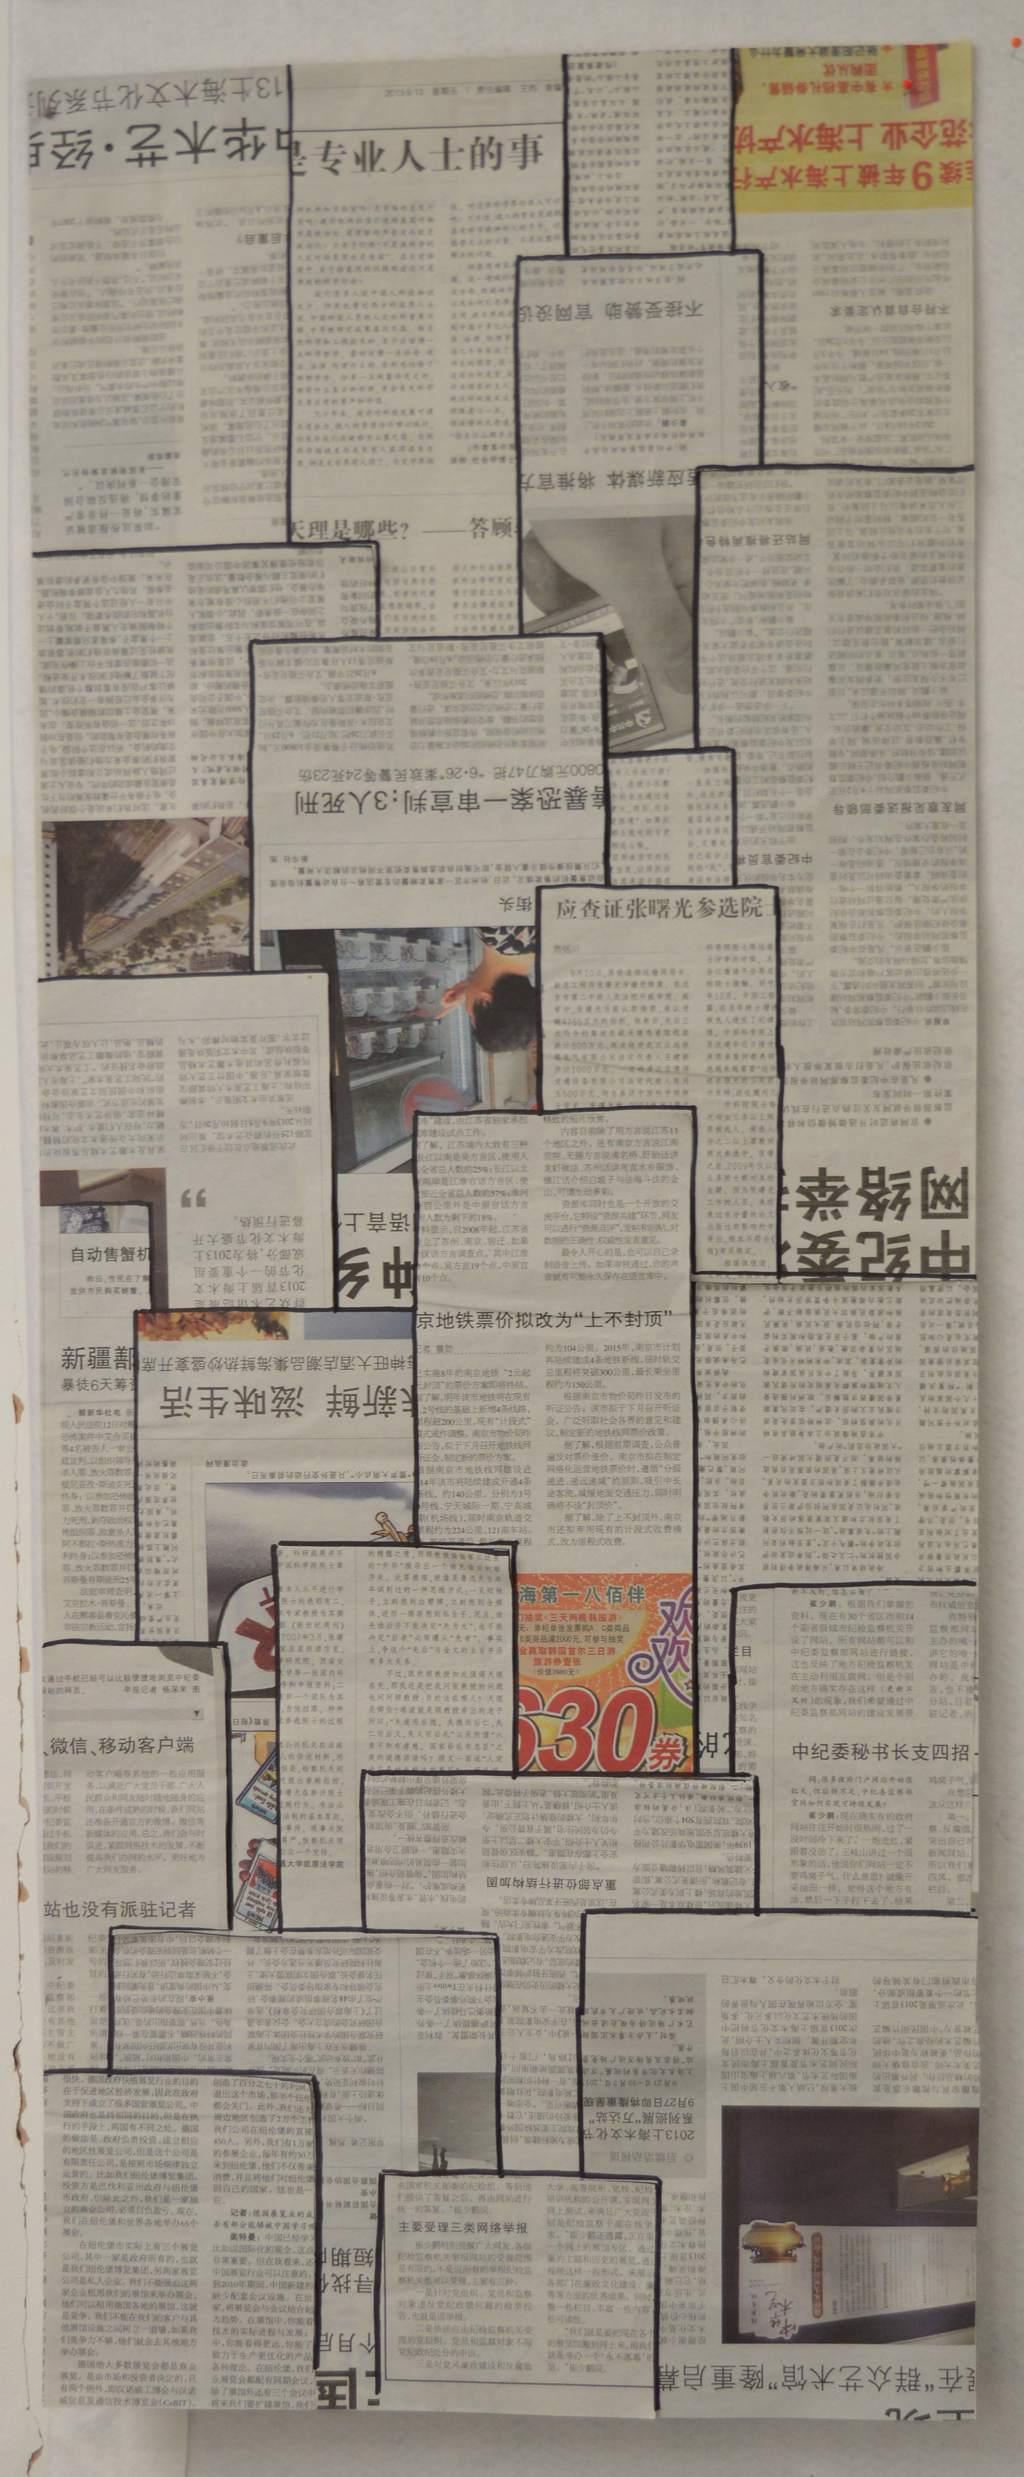
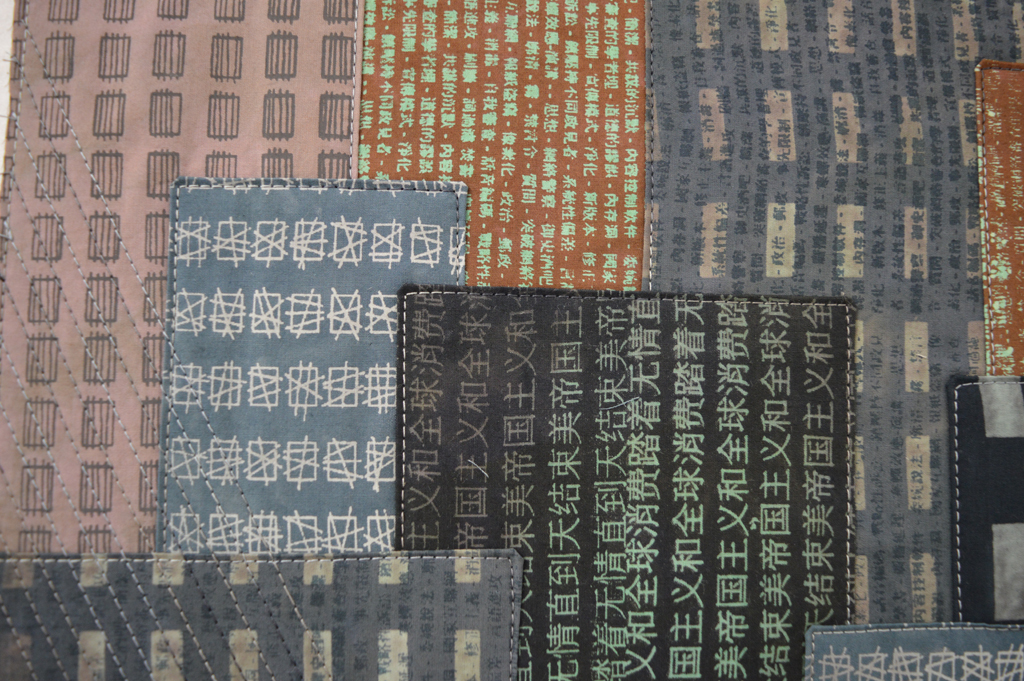
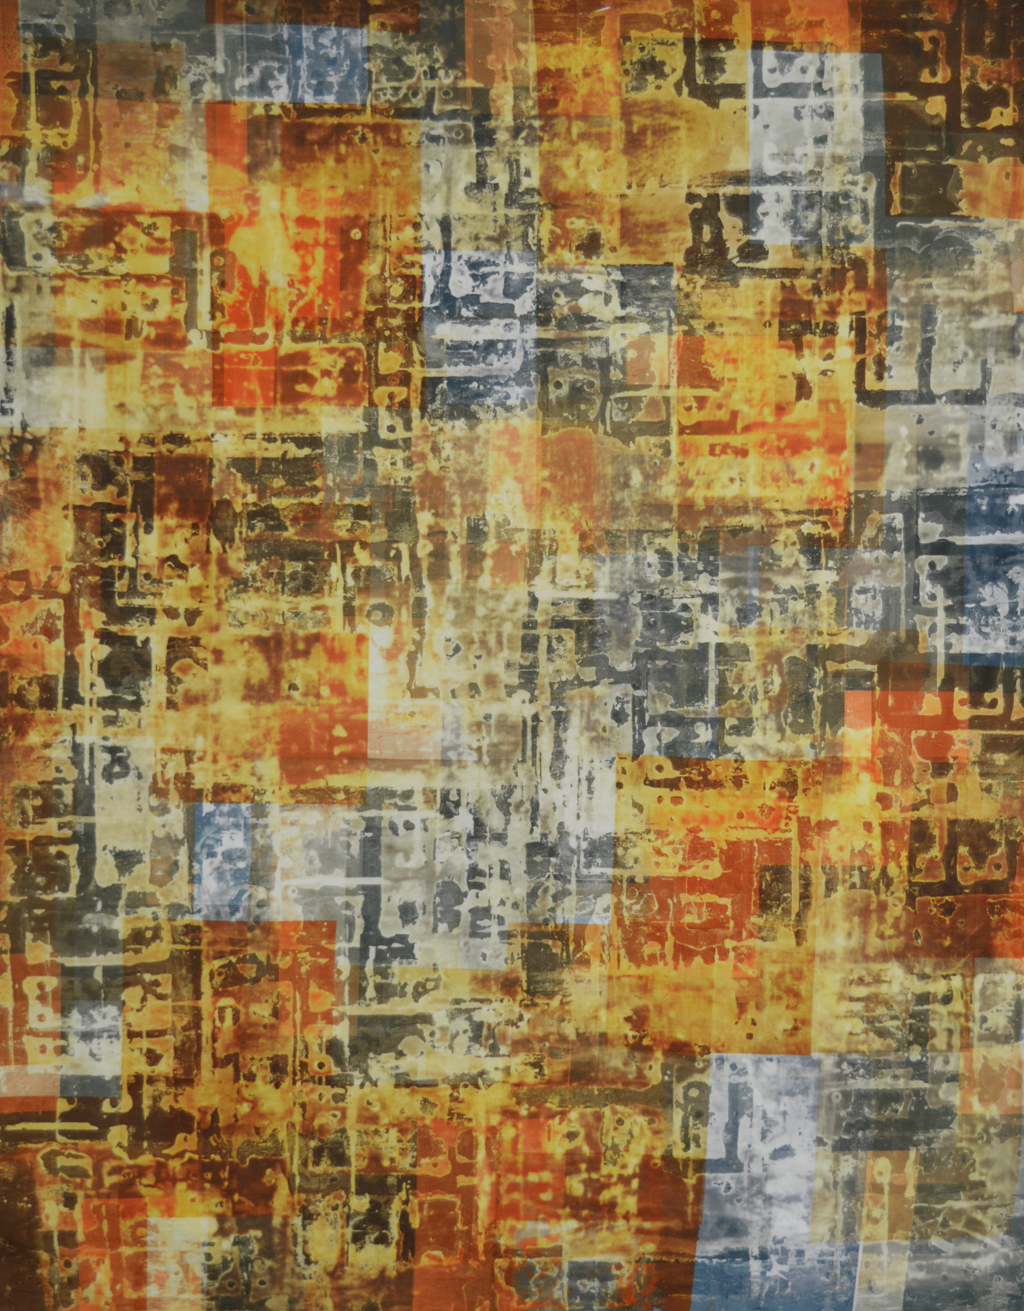
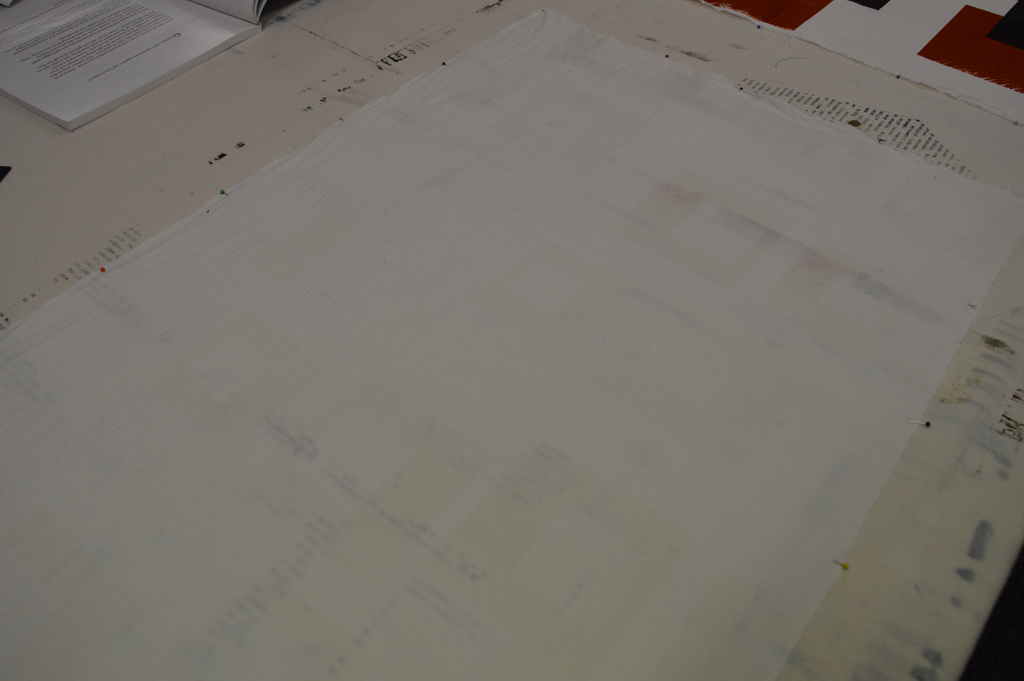
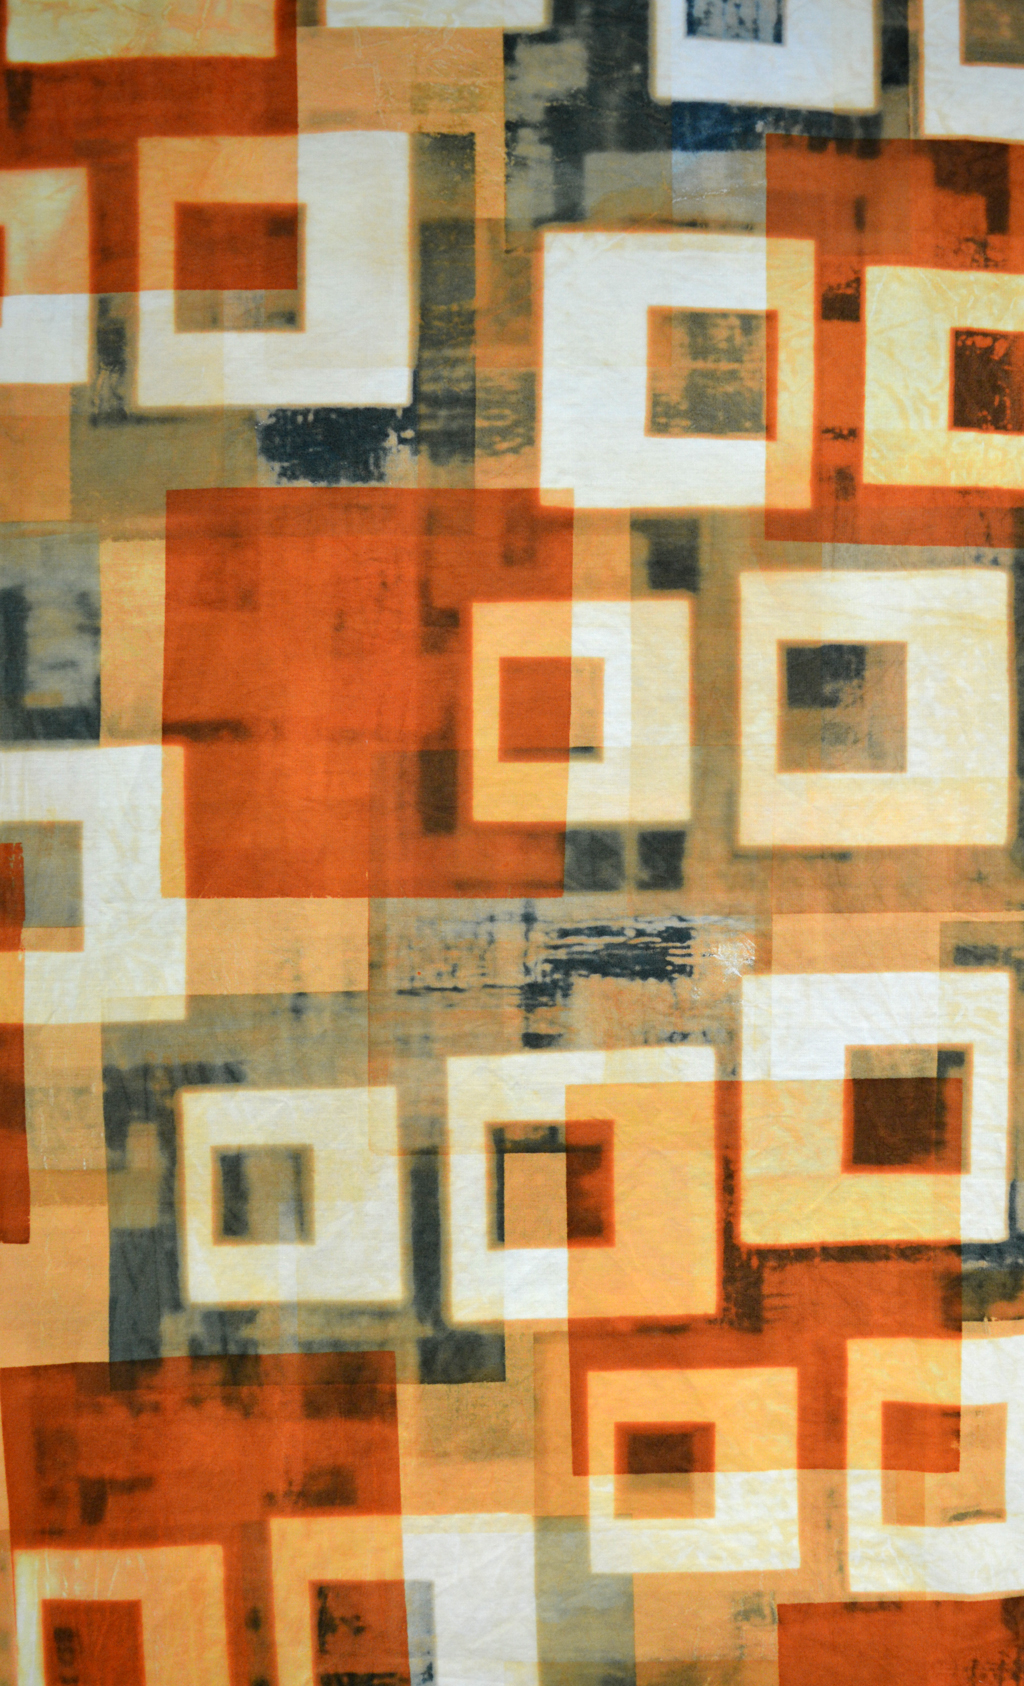
I've had a great week in my studio printing and discharging 4 pieces of cloth simultaneously as well as continuing to stitch the next Ruins piece. But, for various reasons I can't share images right now. So instead I thought I would share the story of my studio. I am an incredibly lucky person. I have always had a room to work in even when the kids were still at home. There were years when I had a decent sized room and years when I was squeezed into the box room. Once the last one left home I was able to move into the biggest bedroom in the house which had the added benefit of having a small ensuite. So instead of dyeing fabric in the kitchen I was able to set up a small wet area in my studio. For the first time I was able to experiment with screenprinting and lots of other wet processes. I took the time to paint the room white, to add good lighting and to build lots of storage shelves and cupboards. And it really paid dividends. Both in quantity but more importantly in the quality of my work. Having a good space to work caused a step change in my thinking and in my intention.

But after a couple of years I realized that I needed a much bigger wet studio. And so in summer of 2013 we started to renovate an old outbuilding that sat at the back of our property. We brought our house about 16 years ago and always intended doing 'something' with the building but never quite figured out what. So over the years it has been a garage, a teenage hangout, a smoking shed (how come my kids all smoke when we've never let them be around smokers???) and a general dumping ground.

Before starting the renovation

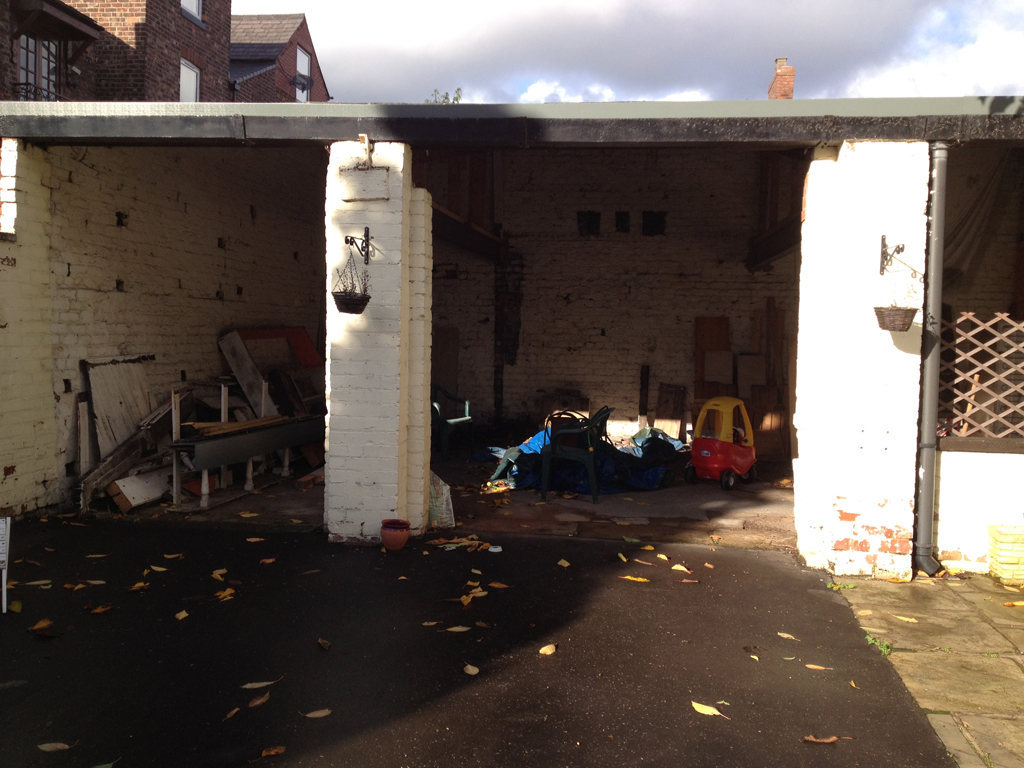
We were put in touch with a great builder by Helen Conway www.helenconwaydesign.com  (big thanks Helen!) who took up the challenge of creating a warm, dry, well lit studio at minimum cost. We used windows and French doors that were 'seconds', recycled timbers where we could and second hand cupboards. The one thing we really went over the top on was insulation as I knew I wouldn't use a studio that was cold and damp in the winter.

Work in Progress!

Building work finished - now the hard work started!

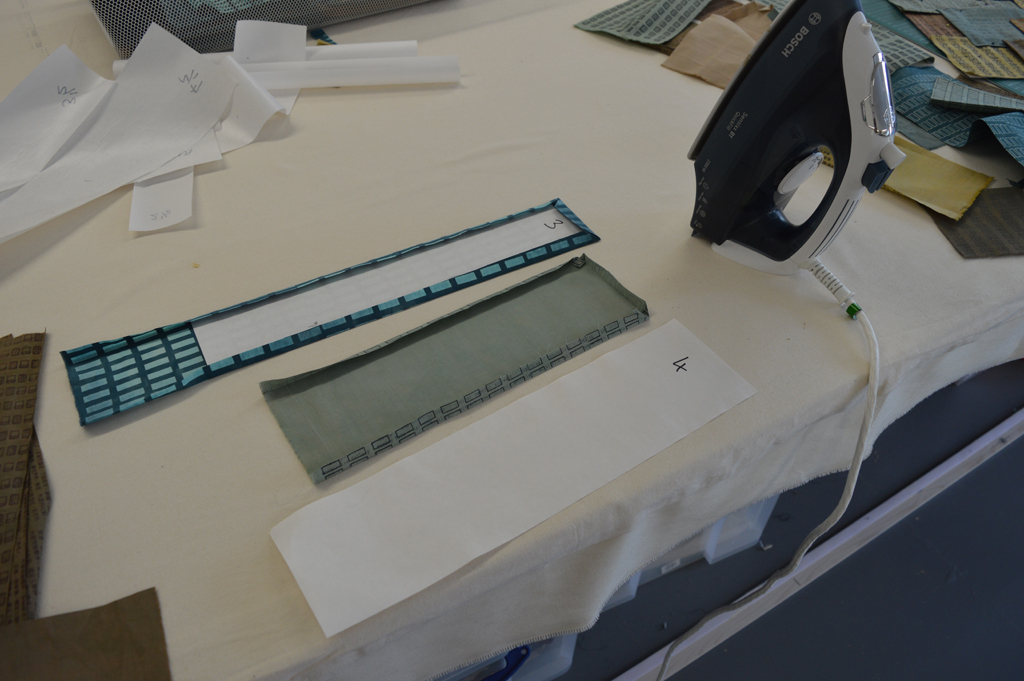
The builder finished work on 23rd December 2013. We didn't have the money to pay him to do the painting and finishing - so for the next eight weeks myself and Callum (middle son) painted, sanded, sealed and tiled. It was incredibly hard work but at the end of February I was able to use the studio for printing and dyeing. I had cupboards, a working sink and a massive print table. No cupboard doors and over half of the studio still full of timber and part built cupboards. But I was in heaven!

Print bench (140cm x 350cm) is built on top of kitchen units with long wide shelf in between.

Studio life took a bit of an unexpected turn last spring - Cal was finishing up his Interactive Art degree and looking around for something to pay the rent that would still allow him to work on his music and art. He decided to start a picture framing business as he loves working with hands (and couldn't abide the thought of working full time in retail or in an office). So my studio has become our studio. Which meant building units to store tools, as well as glass and mountboard. And building Cal a bench to work on.

Today we share the space. He uses it 2 to 3 days a week and I use it in the evenings and at weekends. We have to constantly clean up as sawdust and fabric don't mix but it has been a real pleasure seeing his business take off. Hopefully he will move into his own studio in a few months at which time I'll take over the whole studio.

Callums' space

My sewing table with storage behind

My print table and design wall

Having this wonderful space has allowed me to make some big changes in the way I work. Last year I really 'got the hang' of working in series and have started to work on two series at the same time. I am able to work on multiple pieces without constantly moving stuff around. I have different pieces at different stages in their creation. I work in my studio every day, even on those days when my day job has been tiring and frustrating. Unlocking the door and stepping into my studio fills me with energy. It is allowing me to develop as an artist.


leahhigginsComment
Breakdown with Discharge Paste

Breakdown printing with discharge paste Another piece of gorgeous fabric created this weekend. I made a breakdown screen by spreading a layer of Formosol discharge paste on the back of a screen and embedding some metal joining plates. (Yes - B&Q is a great source of interesting bits and bobs!). After letting the screen dry completely I printed through the screen using plain print paste onto a piece of fabric that I had previously printed with the darker colours from the rust / black colour family. I kept printing with the screen until all the discharge paste had peeled off onto the fabric.

I left the fabric overnight to dry before using an iron (carefully) from the back of the fabric to activate the discharge paste. The black areas of the fabric discharged very easily to a chalky cream colour. Discharging the rust areas was more difficult and left a golden yellow colour. Ironing the cloth baked the print paste into the cloth so lots of hot soapy water and agitation was needed to wash the fabric. But the results were worth it!

Breakdown printing with discharge paste

leahhigginsComment
Playing with Discharge

My good friend Ruth Brown (http://stonecreektextiles.co.uk/) has come to stay and play for a few days. And we are having great fun in the studio! Ruth and I meet at a C2C course several years ago and have been 'workshop buddies' since then. We've also worked together in her studio but this is the first time she has worked in my studio.

As well as working on our own projects we often have a technique that we want to experiment with. This time it is discharge. We've both used different media and techniques in the past so our time together has been about sharing knowledge but also about asking 'what if?'.

And one 'what if?' has lead to a really surprising result. We wondered what would happen if you used discharge paste and thickened procion dyes at the same time? So we took a piece of pre-soda soaked fabric and printed it with a Formosol paste (Formosol powder dissolved in a little warm water then mixed with print paste). We let that dry then used an open screen to apply thickened dye. The piece was left to dry overnight. We then ironed it carefully from the back to activate the discharge paste before rinsing and washing thoroughly. The discharge process definitely worked but somehow we have got shadow images and don't really understand why. Guess we will just have to keep playing tomorrow!

Discharge paste printed onto white, soda soaked, cotton

Thickened dye added by pulling through an open screen on top of screened discharge paste

Discharging the fabric

Printed and discharged wholecloth

leahhigginsComment