It's all about Ruins

Another sneak preview of Ruins 5 
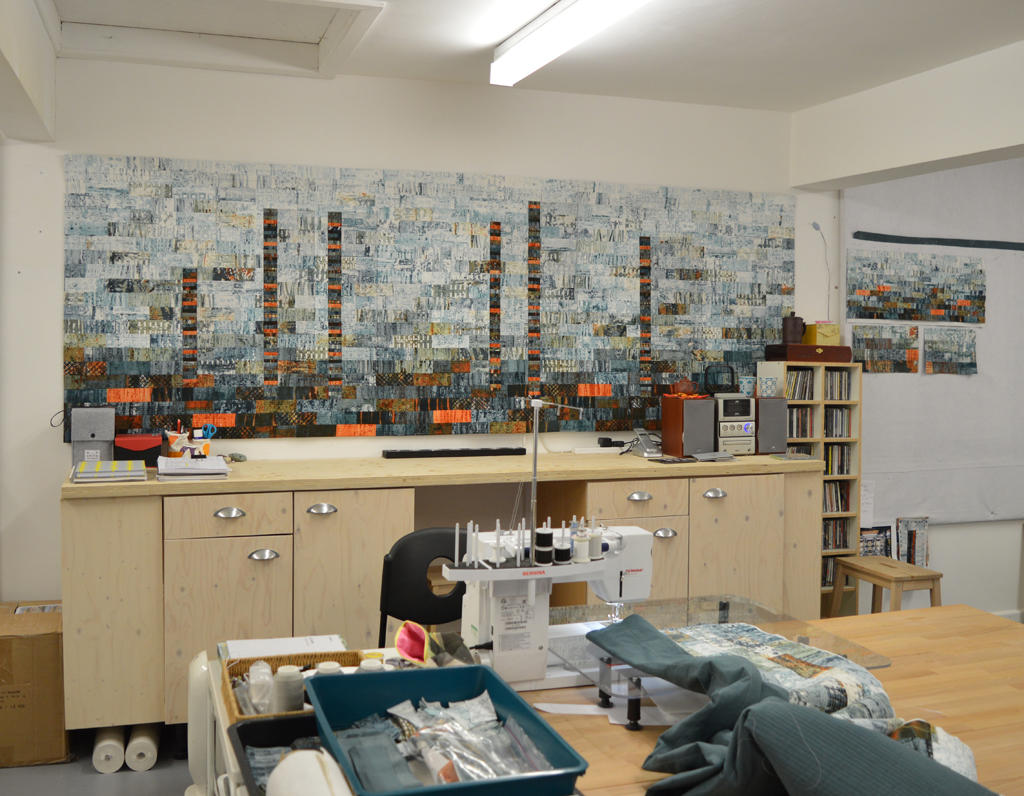
I used the back wall of my studio to photograph Ruins 5 as it is the only space I have that allowed me to do so without using a wide-angled lens. I had to move music system, CDs etc out the way but this seems a small inconvenience compared to finding and possibly hiring somebody else's white walled studio / gallery space. This is about the widest piece I'll be able to photograph with my studio in it's current configuration. Would that stop me working on a larger piece in the future? No - I think I work best when I don't set constraints, when I let each piece be the size the piece wants to be.

I was planning on re-hanging Ruins 5 in our living room but have decided to leave it in the studio whilst I continue working on another large Ruins piece (on the sewing table) and whilst I consider different options for small Ruins pieces (on the design wall). There is something energising about surrounding myself with work from one series. It fills my head with new ideas but also helps me evaluate work in progress with a more critical eye. Another benefit of working in series rather than on isolated pieces!

Working in Series

Detail from Ruins 1 It has been a couple of weeks since I posted as I have been busy finishing the latest piece in my Ruins series. It combines elements of Ruins 1 and Ruins 4 but on a larger scale. The piece is 299cm wide and 102cm high and is going to be a devil to photograph! But it is a great example of how working in series is allowing me to gain confidence as an artist. Time is precious and I would not have started a piece of this size without being confident that it would 'work'.

Quite by coincidence I've read a couple of blog posts this week that talk about working in series. The first is by Lisa Call in which she shows some of the final pieces in her Structures series. This series was started in 2000 and has resulted in 200 pieces. Which is pretty amazing when you think about it! It is really interesting to see how more recognisably 'Lisa Call' the later pieces are.

The other post was by Elizabeth Barton. She makes the case that working in series is not limited to abstract art; it can be representational as well. She illustrates it with pieces from 3 of her series. Unlike Lisa, Elizabeth used quite different styles in some of her series.

Both artists teach courses on working in series and Elizabeth has published a great book on the topic.

Bookcloth part 2

This time I used a lighter weight, more expensive Kiraku Kozo paper, again from Shephards. Being lighter weight meant it was more tricky getting the paper laid on top of the cloth. It's a shame you can't buy a second set of hands and keep them in a cupboard until you need them! But being lighter weight meant that it was easier to get good adhesion to the cloth. Again I followed instructions given in the Big Jump Press blog. Just like the piece made with Kozuke paper this piece was quite stiff when dried. Recording my experiments!

However I don't think the stiffness is a problem. I used the first piece of bookcloth to make the outer cover of a 'soft' spine book following instructions on a DVD by Paige Martin called 'Stitch this book'. As it was my first attempted I glued each piece of book board separately and placed these onto the book cloth. I had no issues with blisters or creases - it went together easily. My corners weren't great but practice will make perfect.

I left the cover overnight to dry then added a liner made from the second piece of bookcloth. Again it was pretty easy and I now have a finished book cover! It's been really enjoyable so will spend the rest of today making more bookcloth with the other two types of Kozo paper I have.  A nice way to spend my weekend off!

Completed book cover - outside

Completed cover - inside

Making bookcloth part 1

Last night I made my first piece of bookcloth. I used a piece of my hand dyed cotton poplin with a sheet of Kozuke (44grams) from Shephards. I followed the excellent instructions given by Sarah Bryant on her blog Big Jump Press. Sarah tells you how to make your own starch paste - I cheated and brought some ready made from Ratchfords. I diluted the paste about 50/50 with cold water. Diluted starch paste

I found the process really easy but had to use a stippling brush across the whole surface to get good adhesion between the paper and the cloth - maybe a combination of not getting the fabric wet enough and the starch paste being a little too thick?? Or because of the weight of paper?

Fabric on paper ready to leave overnight to dry

It dried nicely overnight but feels stiffer than I thought it would. So this morning I am going to make another piece. I'm going to spray more water on the fabric and leave it for 10-15 minutes before adding the paper. I'm going to dilute the paste just a little bit more. I'm also going to use a different, slightly lighter weight paper. And yes the scientist that I am in my day job is screaming about the dangers of changing too many variables at once! But, what the heck, it is my weekend off.

My first piece of bookcloth

Taking the weekend off

I was due to spend this weekend visiting Ruth Brown in her studio on Sunk Island. We get together a couple of times a year and generally do some printing or other surface design work; either experimenting together or doing some of our own stuff. This time however I didn't really have any wet work that I wanted to do so suggested that we do something completely different - making bookcloth and bookbinding. I've been thinking about taking up a hobby for a while. Yes, crazy I know given how much I pack into my days already. But sometimes I just want something I can do that I am less 'invested in'. Something that doesn't have deadlines. And bookbinding really appeals to me - it requires precision and attention to detail, it can use some of my stash of hand dyed fabrics and it can include stitch. And, no surprises to anyone that knows her, Ruth happened to have some DVDs on bookbinding that she could send me. But unfortunately Ruth is poorly (get bettter soon!). So, with a deadline looming, I could be sensible and spend the time working on my latest Ruins piece. Or I could stick with plan A and learn some new skills. I'm opting for plan A. So here are all my new treasures ready to go. Gorgeous hand dyed fabric. A selection of Kozo paper. Paste and glue. Book board. Tools. And a lovely sketchbook that Ruth gave me to record my experiments in bookbinding in. Fingers crossed!


Defeated by rejection - nope, not me!

Storm 1 (Jagged) 
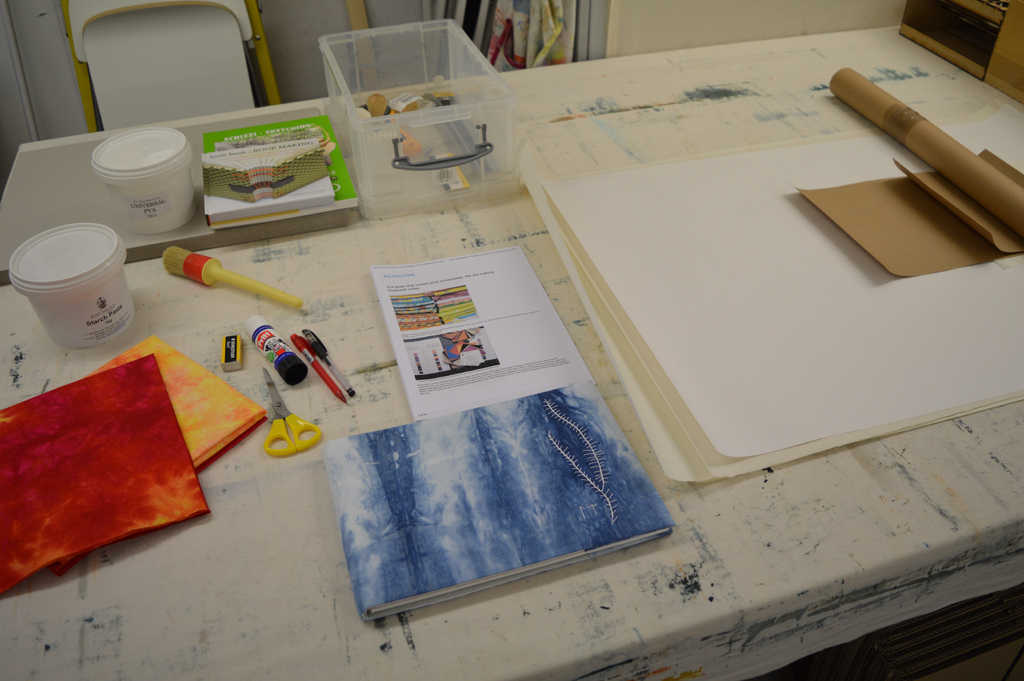
It has been a while since I have written about Steven Pressfield and his book 'The War of Art' but this week I had reason to reread sections of the book. I got the news that the pieces I submitted to the SAQA calls 'Tranquility' and 'Turmoil' had been rejected. Nobody likes rejection but for many people it can be distracting or even paralysing. We all fear rejection. That fear is hard wired into us. But Pressfield says that a 'Professional' artist cannot take rejection personally. Instead she should self-validate and assess her work coldly and objectively. ''Where it fell short, she'll improve it. Where it triumphed, she will make it better still. She'll work harder. She'll be back tomorrow.''

So in the time it took to drink a cup of good coffee (and eat some chocolate) I assessed the pieces (including Storm 1 Jagged) that had been rejected. Did I achieve visually what I wanted with each piece? Yes. Were they crafted to the best of my technical ability? Yes. Did I present them to the best of my ability? Well maybe not - they were hard to photograph so I need to work on this. Will I let rejection stop me from working on the Storm / Still series? Will I let rejection stop me submitting works from this series to other calls? Will I let it take anymore of my precious time in the studio? Nope. No way!

And with that I put on some loud music, sat down at my sewing machine and stitched for two solid hours!


Meet the artist - Etcetera at Ryedale

Work by Sandra Wyman Whilst I am enjoying a very relaxed 4 day weekend in my studio Linda Bilsborrow and Sandra Wyman from my exhibiting group Etcetera will be at Ryedale Folk Museum tomorrow (Saturday) between 2pm and 4pm for a 'meet the artist' event.

The seven members of Etcetera have created seven very different interpretations of the word 'Transitions'. Linda's Lifeline series deals with the transitions between different life stages - the phases of our lives that we all go through but cannot really see until we look backwards. Sandra has created a series of pieces that are autobiographical and represent a time of profound personal transition and self-discovery.

The Museum is in Hutton-le-Hole, North Yorkshire. The exhibition runs until Saturday 7th May.

Hidden Messages 2 and 3 at Ryedale Folk Museum

Hidden Message 2 The best thing for me about the
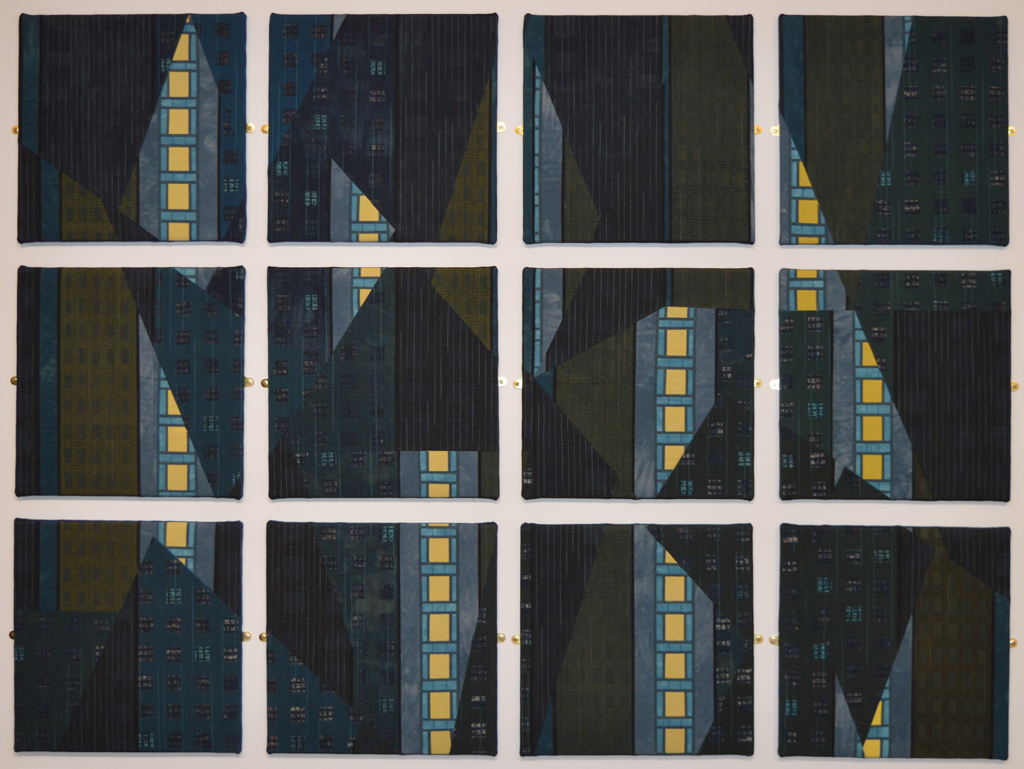
 Etcetera exhibition at Ryedale is the opportunity to show Hidden Messages 2 and 3 in their final form. Both started life as more conventional quilts, albeit that Hidden Messages 3 was finished as 4 banners. But I was never happy with them. So I cut them each into 12 individual 16x16 inch pieces and stretched over canvas. And then put them away as I didn't even have space to photograph them. But here they are now. I think it was worth the wait!

Hidden Message 3


Transitions by Etcetera

The Etcetera exhibition opened at Ryedale Folk Museum yesterday and will run until 7th May. The museum is in Hutton-le-Hole, a very picturesque village in North Yorkship. Admission to the art gallery is free. We will be running a few meet the artist events as below and hope that you can join us!

Saturday 26th March: Linda Bilsborrow and Sandra Wyman Sunday 17th April: Julie Bunter and Sandra Wyman Saturday 23rd April: Leah Higgins and Linda Bilsborrow

Here are a few images, more to follow.

View from the entrance of the gallery

Work by Julie Bunter and Linda Bilsborrow