Posts in Techniques
Just add stitch

I’ve just arrived home from my annual artists retreat with twelve textile artists and friends in Grasmere. As always the company was funny, supportive and all round wonderful and the location, in the Lake District, beautiful. And as usual it did me the power of good and recharged my creative batteries.

We all work on our own projects and I took three pieces of printed fabric to add stitch to. Despite an emergency dash home to collect my spare machine when I managed to jam a needle in my sewing machine, I completed all three pieces.

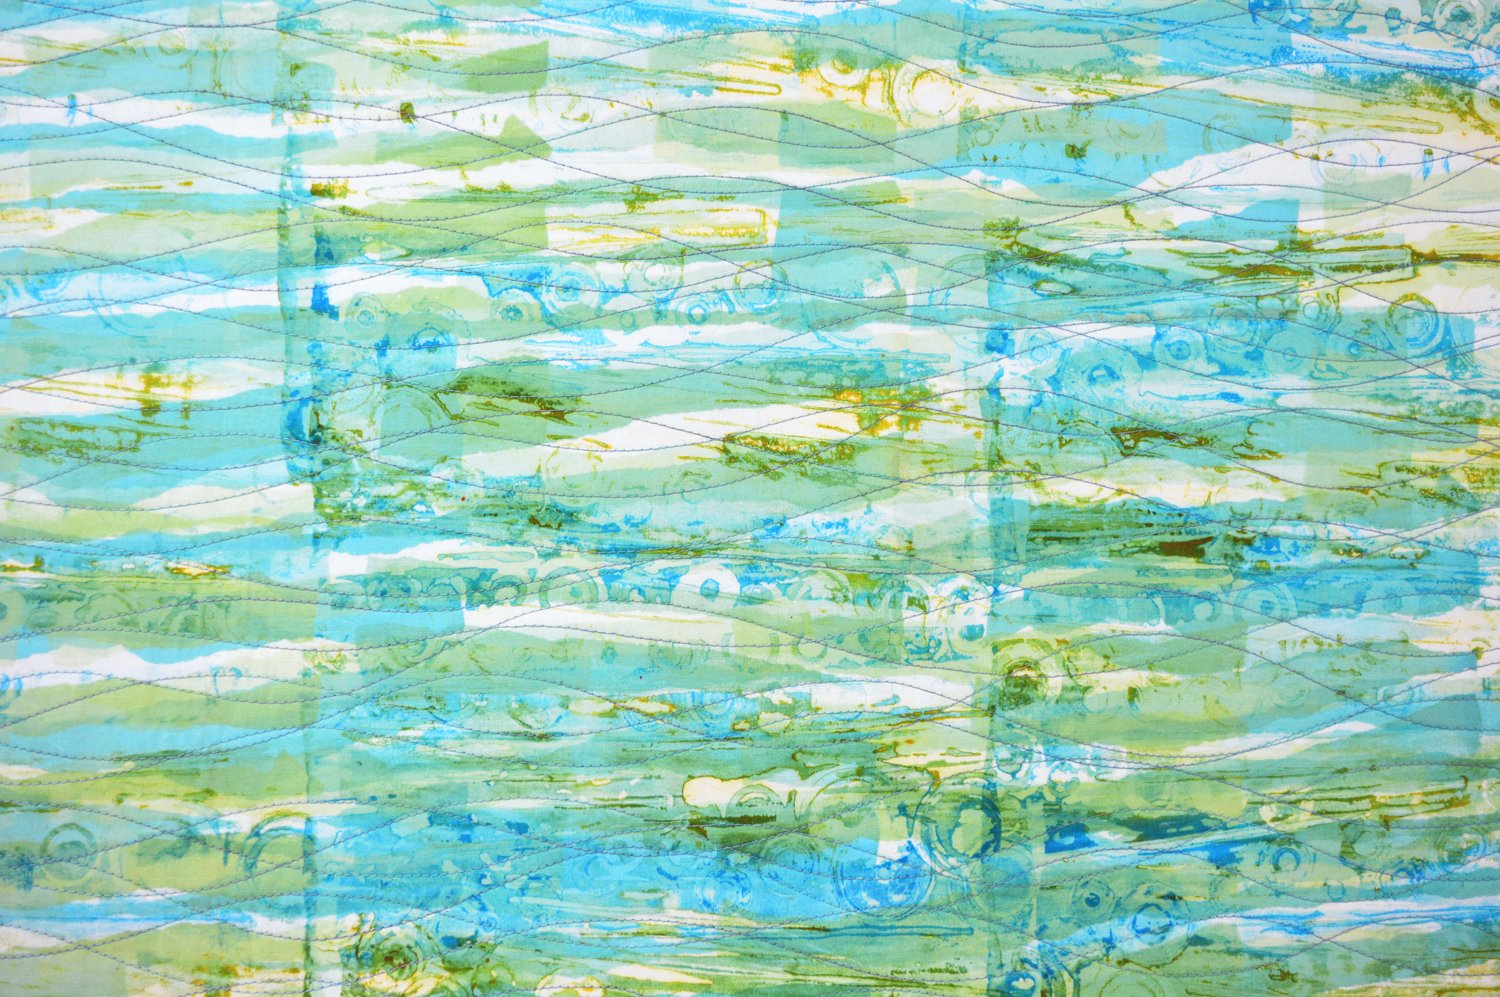
The pieces are from my upcoming online workshop Simply Screen Printing and needed stitch that enhanced the printed marks and lines rather than distracted from them so I kept it simple. The photo above (detail) shows simply curvy lines added fabric that had been printed with a loose paper resist intially then over printed using a breakdown screen. The photo below (detail) shows simple straight lines added to a piece that had been printed using a loose net resist. I also sewed around the circles which really helps them ‘pop’.

And finally, the photo below (detail) shows a simple grid of blue and light brown lines added to a densely patterned piece of breakdown printed fabric. If I have time to add facings and finish these little quilts I will take them to The Scottish Quilt Show in Glasgow on 7th to 9th March.

Simply Screen Printing will be available from this Friday 1st March. Featuring 25 hours of video and detailed notes , it will cost £300 for 12 months access which means that students can work at their own pace knowing that they have support from me via monthly Zoom meetings, a private Facebook group and email. More details to follow, so watch this space!!

Lights, camera, action!

A little bit of Hollywood is visiting Urban Studio North! Filming for IMAX 70, in Dolby surround sound, with an Oscar nominated screenplay, audacious multi-million $ action stunts (eat your heart out Tom Cruise) and a cast of thousands ……

OK, so it’s a cast on one. Screenplay, what screenplay? And the most audacious action sequence was me dropping my screen part way through printing some fabric. Although the not-quite-Dolby sound system did do a pretty good job of capturing my swearing. Hmmm………..

Yes I am busy filming Simply Screen Printing. Just me, two static cameras and some reasonable priced editing software. I was originally going to include a dance sequence with Ryan Gosling but he didn’t turn up for rehearsals. Instead there will be a feast of beautifully screen printed fabrics and hours of detailed instruction on how to screen print at home. The workshop will be available from 1st March but, for now I thought I’d share what I think is my favourite piece of fabric printed in the workshop. Can you guess how I printed it?


Pigment #1

…… because we all deserve some colour in our life during these grey January days!

May I wish you all a very happy and creative 2024 and express my thanks to those of you who have brought my fabric packs! You are definitely worth it ladies!

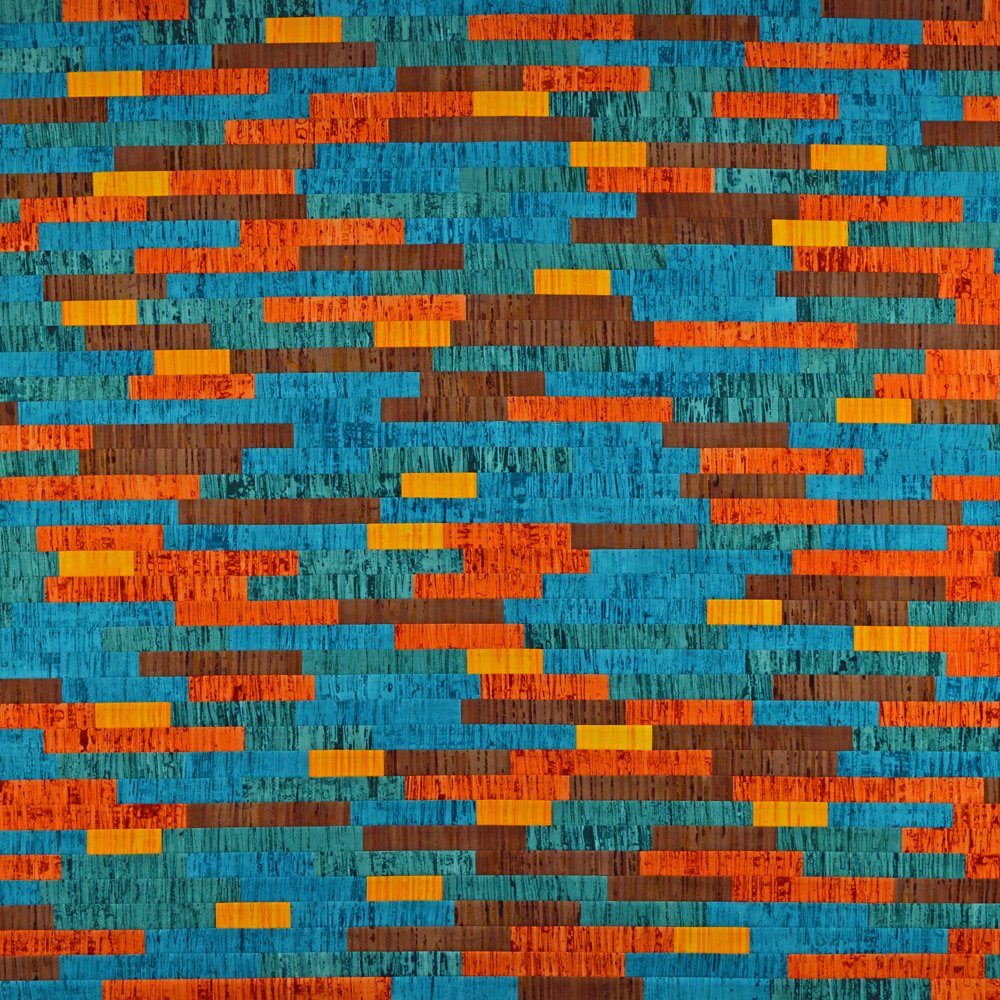
I thought I would start the year by sharing one of the new pieces I made for my current exhibition (Beneath Our Feet). This isn’t one that was rolling round in my head for ages, instead it popped out as a fully formed idea after seeing an image of a collection of solid coloured vases made by Pilkington Tile & Pottery Company around the turn of the 19th century. Pilkington is one of the inspirations for my Artefact series with all the quilts I have made so far being pale and quite subtle in their colouring. Not this one though …. which is why I have chosen to not call it Artefact 7.

Pigment #1 celebrates the wonderful, brightly coloured glazes developed by the Pilkington chemist Abraham Lomax and others. The development of these glazes was an early example of where scientific advances, in this case in inorganic chemistry, were applied to the art of the potter. Using Dimitri Mendeleev’s newly published Periodic Table as a starting point, the Pilkington chemists carried out hundreds of controlled experiments. Oxides of copper, cobalt and iron were used to add colour to the crystalline, opalescent, eggshell, transmutation and lapis glazes developed by the company.

I selected five colours - golden yellow, rust, dark brown, a turquoise and a green made by mixing turquoise and dark brown dyes. The fabrics were breakdown printed with multiple layers of print to build up the density of marks. I then added a layer of the appropriate colour to both the front and the back of each fabric creating a set of vibrant fabrics. The fabrics were cut into stripes then into different length pieces. I kept all the golden yellow pieces 3 inches long but varied the lengths of the other colours. I then used my usual composition process - I jumbled the fabrics into a big pile, closed my eyes and picked pieces at random. These pieces were laid out in the order I picked them before being sewn together. I did swap out a couple of pieces but that was all.

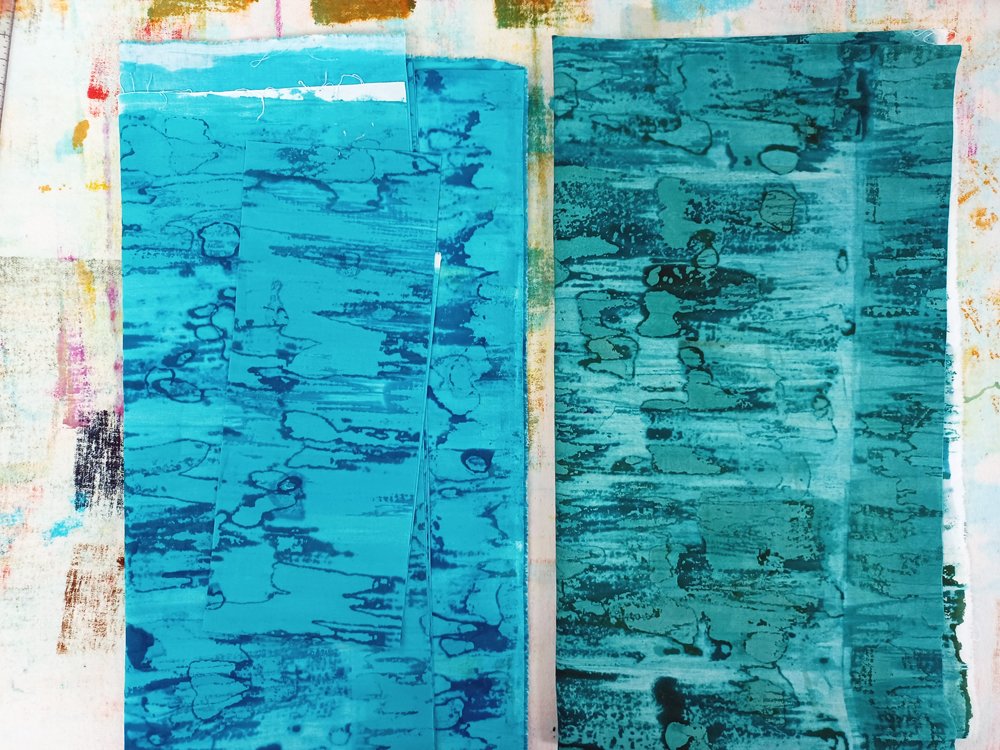
All good and such fun. I took photos with my camera as I worked so that I could post on Instagram. And something really interesting happened. The image above was taken with my fancy pants camera at 300dpi and is a really good representation of the colours. The image below was taken with my phone at 72dpi …. and the colours look so different even though the lighting conditions were similar. The green is indistinguishable from the blue and the brown looks much more blue than it actually is. Which is really weird. So I used my camera to photograph pieces of the blue and green fabrics with space around the two fabrics (scroll to bottom) and they are very definitely different colours.

The science of colour is fascinating. How we each ‘see’ colour is unique as it depends on the biology of our eyes but also on the interaction of different colours as they are placed side by side. And how we ‘share’ colour is dependent of the devices we use to capture and display colour.

I love it and am looking forward to having a colour filled 2024!

Steady Progress

First of all, a very big thank you to everyone who got in touch after my last post - your support means the world to me.

I have spent the last three weeks or so focussed 100% (well maybe 98%) on making art for my upcoming exhibition. And it has been wonderful! An unexpected heat wave has slowed me down a bit over the last couple of days but I’m one day ahead of schedule and, much more importantly, I’m really happy with the work I’m creating.

I will be making 3, possibly 4 new pieces and reworking an older piece. Doesn’t sound much but this includes two new, large pieces from my Ruins series. The last piece I made in this series was in 2019. Although I had some fabrics left over from then, there was nowhere near enough for the art I plan to create. So on Monday 21st August I started printing with the aim of printing 15 - 20 metres of fabric, more than I need right now but Ruins is an ongoing series. Since then I have finished the construction of Ruins 12 and have started quilting it. All of which is best explained in photos ….

  1. (Above) The fabrics I already had.

  2. (Below) Starting printing - I used 3 colours, rust brown, petrol green and half strength black.

  3. Fabric printed using a wonky barcode breakdown printing screen.

  4. I’ve got a big studio so I might as well use it … printing multiple pieces so that I can let the fabric dry a bit before adding another layer of print.

  5. The dreaded rinsing and washing stage - has to be done!

  6. Five days worth of printing, ironed and pinned to my design wall. Too much ‘light’ and too much ‘rust’.

  7. Dyeing some darker fabric - I included some pieces of light printed fabric which were a bit ‘underwhelming’.

  8. Printing darker, grungier fabrics.

  9. The final palette of printed and dyed fabrics.

  10. Adding small details to some of the fabrics using stencils, thermofax screens and textile inks.

  11. Everything cut into mostly 2.5 x 6.5 inch rectangles. Scraps cut into 2.5 x 3.5 inch pieces. No cherry picking, just cut everything.

  12. Shuffle fabrics, close eyes and pick pieces at random. Lay them out just as they come.

  13. Layout with specific areas in light, medium and dark values. Layout loose on my big bench then sew short ends together and pin to my design wall.

  14. Create my quilt sandwich with hand dyed cotton backing fabric and acrylic felt wadding. Draw parallel lines on the felt and start attaching long strips using the stitch and flip method. First piece, face up.

  15. Second piece, face down.

  16. Sew one quarter inch from line drawn on the felt. Flip the fabric over so front face is now showing. Add next strip, face down. Stitch. Flip. Add next strip …..

  17. Once all the pieces are attached I can start quilting.

Of course its a little more complicated than this but you get my drift. And it will all make sense when the quilt is finished!

Festival of Quilts - its nearly here!!!!

Festival of Quilts starts on Thursday and I am (nearly) ready! I’ve got a bigger stand this year, B50 in Hall 9 (if you stand with your back to the theatre entrance you should be able to see it). We had a great show last year but it was exhausting with just me and best buddy, Ruth, so this year we are going to be joined by my son Joe. Some of you will know him as he’s done shows with me in the past. I’m hoping this gives me a little more time to chat to old friends, meet new friends and possibly look at some of the wonderful galleries. If you don’t have a ticket yet please use the code LEAHHIGGINS23 to get a £2 discount. If you’re at the show please come and say hello!

As well as promoting next years workshops I’m hoping to get some sign-ups to my last 2023 workshop - Simply Screen Printing (the Full Monty) which runs from 2nd to 6th October. I will be offering the workshop at a 20% discount during the show and, because not everyone can make the show, I’m offering it at a 20% discount online from the 1st to 31st August - just use the discount code SSP5DAYDISCOUNT. The workshop normally costs £450 so you’ll save £90.

I will be taking lots of my hand printed and dyed fabric packs (112 Wonky Print + 35 Absolutely Hand Dyed). I’ll have lots of copies of my latest book, Simply Screen Printing along with my book on translating colour theory into colour practice, Colour Your Palette. I will also be taking all the remaining copies of my Breakdown Your Palette book to the show. I only have about 30 left. I’m not going to reprint the book as I’m planning to write a new version either next year or the year after, so once they’re gone they’re gone! (The digital version of the book will still be available). And I’ll be taking Procion dyes, soda etc, screen and squeegees. In fact, I will be taking as much stuff as I can physically get into mine and Joes cars!

And finally, both myself and Ruth will be demonstrating in The Creative Textile Studio which can be found to the left of the theatre. Ruth will be demonstrating different book binding techniques all day Friday, Saturday morning and Sunday morning. I’ll be demonstrating simple screen printing techniques on Saturday and Sunday afternoon. I’ll be demonstrating on my stand as well. Phew, I need a lie down and we’ve not even set off yet!

And back to earth .....

And on to my next ‘big project’. I’ve started filming an online workshop based on my latest book Simply Screen Printing. It’s been over 2 years since I filmed my Breakdown Your Palette online workshop and so a steep learning curve figuring out camera positions and video editing. Challenging but fun! I have to fit filming around teaching so I’m not expecting to launch the online workshop until September.

So in the meantime how about some wonderful breakdown printed fabrics. I had the great pleasure of being joined in the studio by a group of six lovely women from Scotland this week. A big thank you to Heather, Helen, Irene C, Irene M, Mags and Kelly for filling my days with beautiful fabric and laughter! I love my job!

Colour Play in Hobart

And off we went again, this time with 12 new students for a three day workshop in the lovely Moonah Art Centre in Hobart. Temporary print surfaces fastened to our tables, we started with a little colour work - what else! - before moving on to a range of simple screen printing techniques. You will not be surprised to hear that there was plenty of breakdown printing along with some open screen work, some printing with loose paper resists and some masking tape resist screens. Most of the students in the group were new to screen printing but they all ‘got it’ really quickly and produced an amazing amount of work in just three days.

We had a lovely enclosed courtyard where we were able to eat lunch, dry fabric and dry breakdown screens. And they were very patient when I lost my voice (too much talking) and could only croak out instructions. As with every workshop I was tired at the end of each day but the happy, satisfied type of tired that comes from working in a group of creative, enthusiastic artists playing with colour, mark and shape. Yet again I find that I love my job!

And then there is the eye candy! In no particular order ……

Places available on upcoming workshops

I still have more to share from my Australian adventure but my feet are now firmly back on the ground and I’m hoping that I can entice some of you onto the workshops I will be running in my studio in Manchester over the next couple of months.

You can find out more about these workshops on clicking on their names but briefly -

Simply Screen Printing 2-day workshop on 10th and 11th June - this workshop is a basic introduction to screen printing using Procion dyes and is suitable for absolute beginners. You’ll learn how to use a screen on it’s own and with things like paper, string and masking tape to print 5 to 8 pieces of fabric. You’ll also get a brief introduction to breakdown printing. The cost is £180.

Breakdown Your Palette 5-day workshop 12th to 16th June 2023 - my favourite workshop, five whole days breakdown printing. Again this workshop is suitable for beginners and those with screen printing experience. We start by looking at colour when using Prion dyes before working our way through lots and lots of different ways to make and print breakdown screens. Along the way we also look at combining breakdown printing with discharge and you have the option to dye some fabrics to go with your printed fabrics. You can expect to print 8 - 15 pieces of fabric depending on how quickly you work. The cost is £450.

Simply Screen Printing (The Full Monty) 5-day workshop on 19th to 23rd June - we start with the basics as covered in the 2-day version of this workshop before moving on to a greater range of screen printing techniques. This workshop essential includes everything in my Simply Screen Printing book. We will use paper, string, thin plastic, masking tape, freezer paper, washable PVA, flour paste and sticky back plastic to add resists to our screen and fabric. We will mostly use Procion dyes but will also look at how to use a screen with discharge media and with textile inks. You have the option to dye some fabrics to go with your printed fabrics. You can expect to print 8 - 15 pieces of fabric depending on how quickly you work. The cost is £450.

Colour Play in Ballarat

It was an honour to be invited to teach at the Fibre Art event in Ballarat last month and just a little intimidating. One of the other tutors was the brilliant Ester Bornemisza who’s work I have admired for over 20 years so I knew I needed to do a good job! Thankfully my students made that that job so easy. All 12 had previous experience with Procion dyes and 10 out the 12 had experience screen printing and they absolutely flew! Being honest I think I learnt just as much from them as they learnt from me.

We started by looking at colour and specifically colour when using Procion dyes before moving onto different screen printing techniques. Inevitably the group did a lot of breakdown printing but I was also delighted to see great results from loose paper resists. Along the way the whole group helped print a long strip of fabric that was raffled at the end of the event … it raised $70 for the India Project that the Fibre Arts team run.

On the final evening each of the tutors set up a display of their students work. I asked each of my students to pick their favourite two pieces and I think our ‘exhibition’ looked amazing.

Maybe because it was a residential workshop the students really ‘gelled’. So much so that we set up a public Facebook group called Breakdown Printing Australia so that we could keep in touch and, hopefully, grow the love of breakdown printing (which IMHO is pretty blinking amazing) in the region.

So much fabric was printed …… below is some yummy eye candy! I had a wonderful time.