Posts in Techniques
Different but the same

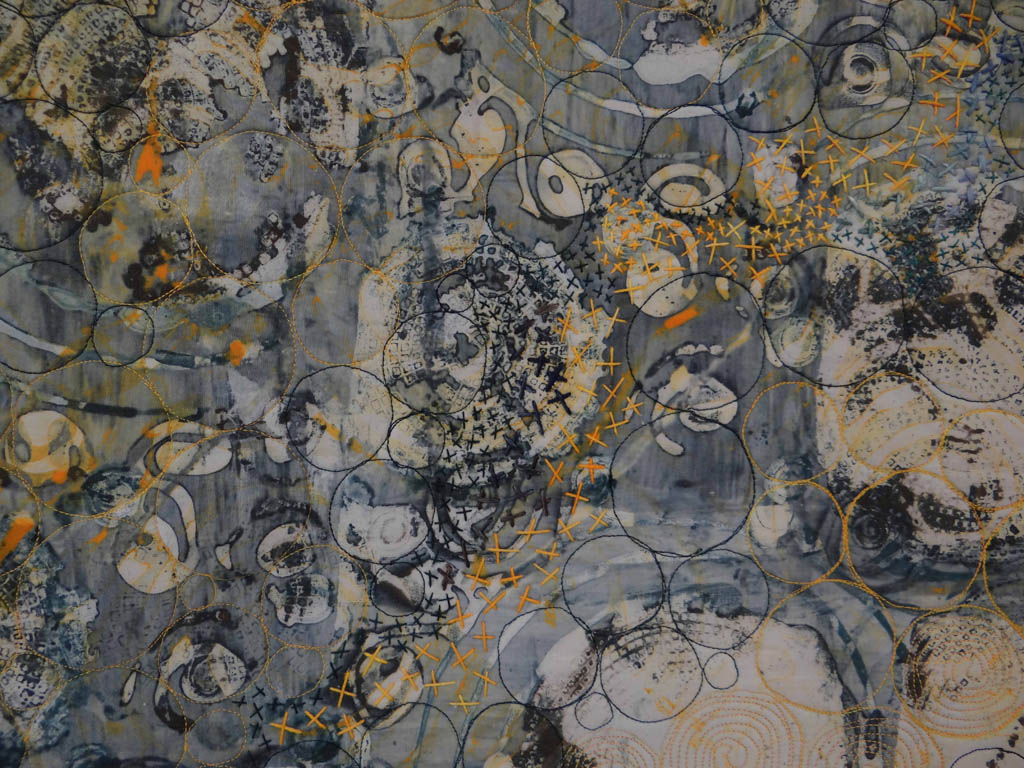
It will come as no surprise when I say that 95%+ of the textiles I use in my work are created using breakdown printing.  Sometimes I include dyed pieces, sometimes I add a layer of print using thermofax but breakdown is my love.

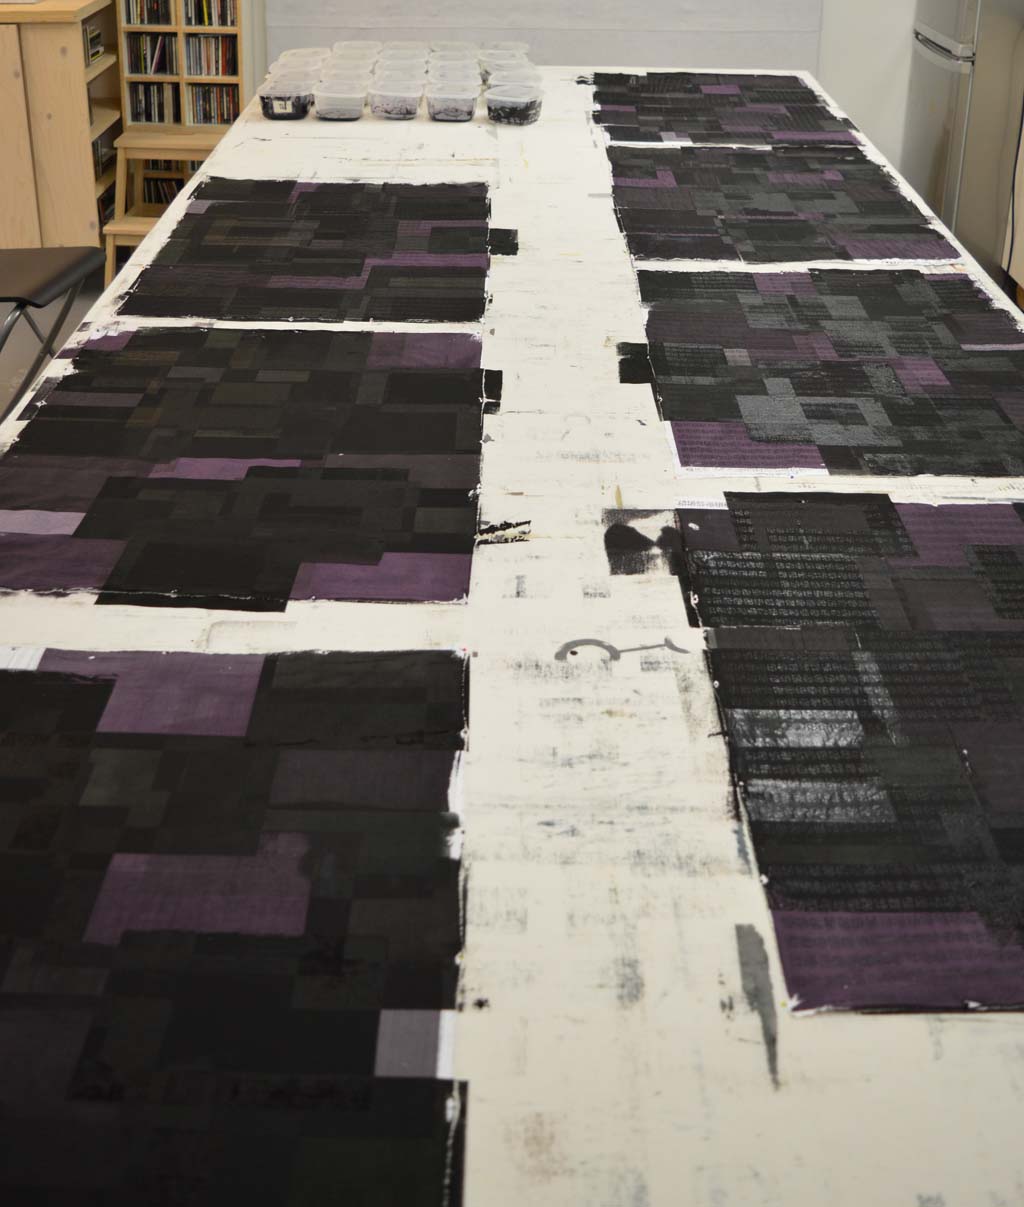
For the last few years I have printed knowing that the majority of cloth is going to be cut into rectangles and used to build backgrounds for series like Ruins. Which means that I don't think about composition when making the screens. I may choose square type shapes to embed or keep things aligned in one direction. When I print the screens I tend to place the prints side by side until I have filled the piece of fabric. Again I'm not thinking about composition. I occasionally cut out a particularly lovely section of cloth to use to cover book board but mostly the cloth gets cut down and pieced.

I love this process and expect to be using it for years but I'm also keen to find new ways to use breakdown - I love experimenting. I've played with printing with both thickened dye and discharge paste before batching my cloth. I've played with multiple layers of colour on a screen. Both gave interesting results but didn't fit with what I was trying to achieve at the time.

And then I saw some images on Instagram by the lovely Leslie Morgan of Committed to Cloth / the Creative Studio and had a lightbulb moment. Leslie and her students were painting thickened dye on screens to give very defined shapes (often buildings) then experimenting with colour exchange when they printed off the dried screen. Wonderful stuff that got me thinking about positive and negative space and how I could use breakdown screens to create series of monoprints.

So I have been playing. And having so much fun. Watch this space ..

Topsy-turvy week

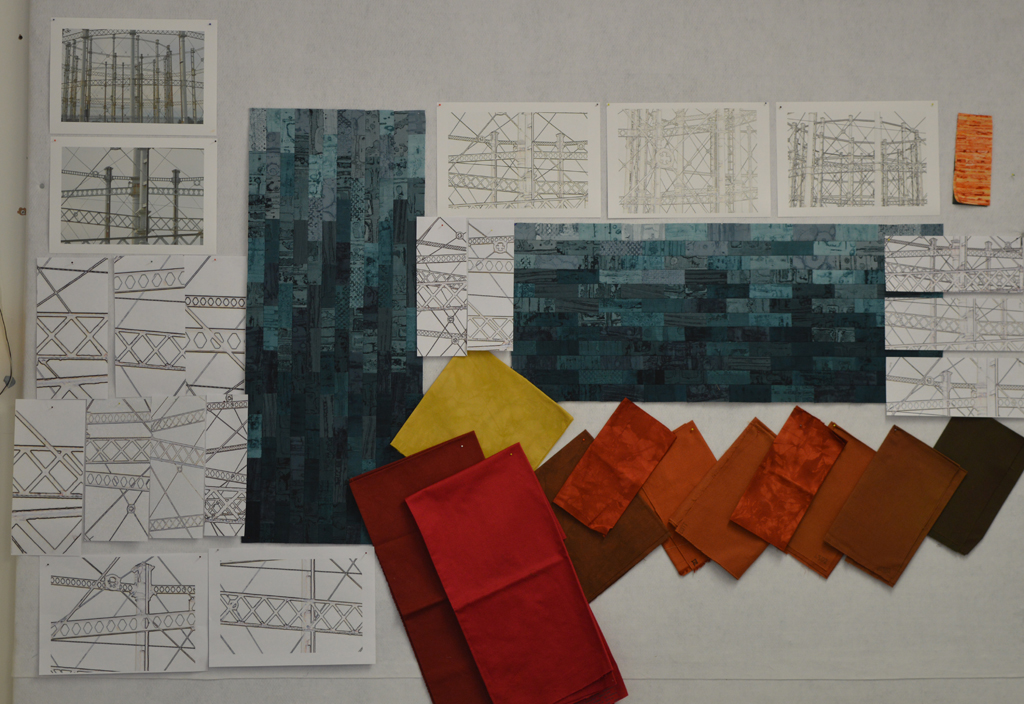
I have completed the first week of my 100 (week) day challenge. My goal is a steady 2 hours every weekday evening focussed on making small art with a commitment to finish at least one piece each week.
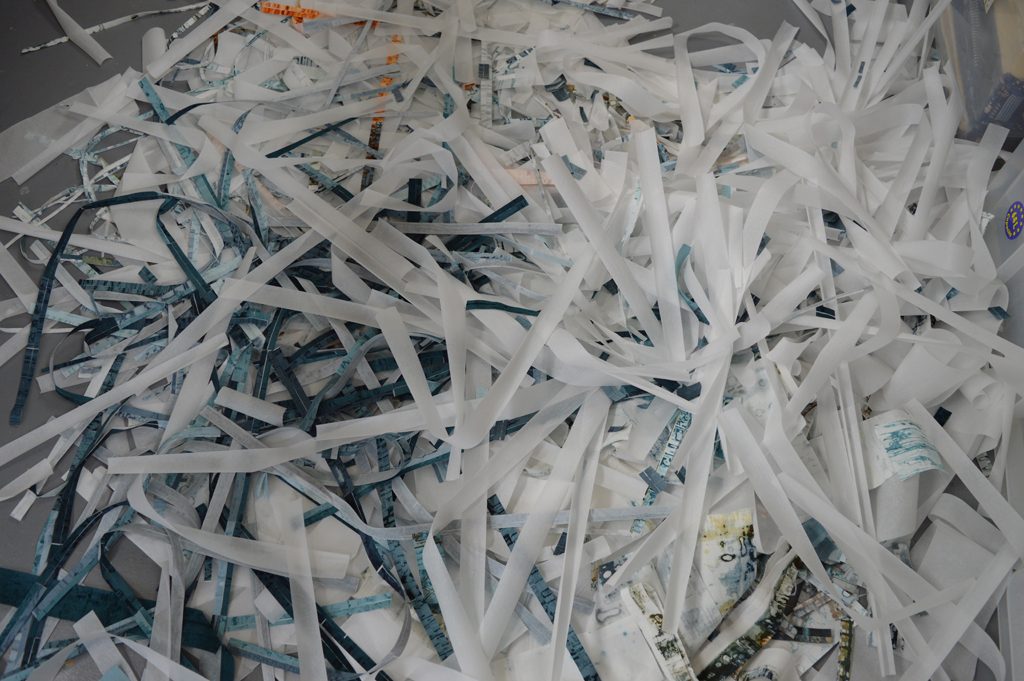
So I got one part right albeit the piece still needs stretching over canvas. Kiln 1 is a small piece in my Ruins series. I want to make art that has some relation to my upcoming exhibition at The World of Glass in St Helens. The museum has a dramatic entrance through a really large renovated kiln and St Helens is dotted with the remains of kilns, both glass kilns and brick kilns. The current Pilkington Glass factory in St Helens has some interesting buildings but brick built kilns are a thing of the past ... which fits in nicely with my Ruins series.

My hours this week though were not exactly steady. I nearly delayed starting my challenge because I knew I had an overnight trip with my day job this week. But then I thought what the heck ... I am never going to get a 20 week period without interuption. I'll be lucky to get a two week period. The import thing is that I work around interuptions. So here is my week:

  • Day 1 - 2 hours.
  • Day 2 - 40 minutes (I actually got out of bed early to work in the studio before heading off on my trip! This is a first for me).
  • Day 3 - 2 hours 20 minutes.
  • Day 4 - 3 hours (keeping busy until the election coverage started)
  • Day 5 - 2 hours

I'll admit to finding the 2 hours on Friday evening rather hard going as I had about three hours sleep before getting up for work at 6.30am. That coupled with the fact my husband joined me in the studio to carry one talking about the results meant that some of my stitched lines were not quite a uniform as I would like. Still I really like the result and am all fired up for next week!

As messy as it gets!

I recently posted that I can't created in chaos. And that messy in my studio is when there are snippets of thread and fabric on the floor. Well I got really, really messy (for me) over the long weekend we have just enjoyed in the UK. I also got sore feet from standing for hours. And my rotary cutter needed a long lie down in a dark room afterwards. But look what I got in return - trays of cut 'bricks' and bondaweb backed 'brickettes' ready to build backgrounds in my Ruins and my View series.

I love printing and it is so tempting to just keep on printing, especially on sunny days when breakdown screens dry quickly. But it is only by cutting up the fabrics that I can see if I have the right balance of colour and pattern. I can see that I have enough fabric to start making backgrounds. I use the bricks to piece backgrounds for my large quilts and I use the brickettes to fuse backgrounds for smaller works. But I can also see that I will need more of the darker fabrics in both series to complete the work I am planning for the rest of this year. Which means more printing. Happy days!

In the cold light of day

Knowing that I have two major exhibitions with Helen Conway in 2018 is amazing. Although I've worked in series for the last few years this will be the first time that I get to create a cohesive body of work knowing the pieces will be hung together. And knowing the spaces where they will hang. Yes Helen and I need to make sure that our work will work together in each space but otherwise the sky is the limit!

And we have well over a year to prepare. We will have about 15m each of wall at World of Glass and a massive 30m each at Stockport Wall Memorial Art Gallery. And we only have just over a year to prepare!! Thank goodness Stockport will be in the autumn.

My hope is to create two completely separate bodies of work albeit both stemming from three parallel series inspired by the urban and industrial landscape in and around both venues. But I have to also be realistic. I had an amazingly productive year in 2016 but my output still fell short of what I need to achieve in the next year or so. I blame my very loud and bossy 'voice'. It wants to work big. It insists on piecing lots of small pieces of fabric. And then it absolutely throws a tantrum if I don't complete the work with hundreds and hundreds of parallel lines of stitch. And, much to Helen's amusement, it even demands that I sew in all my ends.

Something has to change. I have to find a way to make smaller (and more affordable) works that I, but more importantly, my 'voice' can be happy with. So I have set aside the month of April to try new things. Can I make art that can be framed? Can I print onto paper? What happens if I print onto rough linen? Can I fuse my brick walls? Time will tell.

Find something you love

I make a mean lasagne. I could eat it every day but hate washing saucepans so guess what - I don't want to make lasagne every day. But I love all aspects of breakdown printing and I could very happily spend every day making beautiful fabric. I love mixing the dyes and preparing the screens. I love pinning out my cloth and pulling the screens. I even love washing my screens, washing the objects I use on my screens and washing my printed cloth. Because I love it I have spent hundreds of hours learning to  sort of control the outcomes and it now forms the foundation for all of my art. I made my first breakdown screens during a Committed to Cloth workshop in 2010. I wasn't really aiming for anything - I just picked a couple of colours and made two screens.

I printed the golden yellow screen first by pulling through with more golden yellow. I wasn't that impressed. Then I pulled the petrol green screen on top. I was worried that I had lost all the first layer. And then I washed the cloth and feel in love.

The joy of breakdown printing for me is in the detail. Those tiny areas of texture that are impossible to create in any other way. When I made that first piece of printed fabric into a piece of finished art I added stitch that mirrored some of that detail. Today I use breakdown in a very different way but thought you might like to see how I started!

Knots and Crosses (detail)

That wonderful tingly feeling

In my last post I talked about how creativity tends to creep up on me when I am immersed in process. I follow a set process when developing a new series ... I work on the colours first - pinning them on my design wall for assessment. Then I do the printing and pin pieces up until my design wall is covered. I discard fabric that doesn't 'fit' without thinking too hard about why. I then sample different types of construction. In my Hidden Message series this resulted in several pieces going in the bin before I was happy. With my Ruins series (and the series I am developing now) building a background made of bricks felt 'right'. Having stitched some small sample backgrounds I turn to my design wall again. I don't do sketchbooks - I do pinning things to a design wall until something 'clicks'.

Today I pinned up my two sample backgrounds. I rummaged through my boxes of dyed fabric and pinned up a selection of colours. I am not going to decide yet if the foreground will consist of dyed fabric or printed fabric or stitch yet. They are just up there. I added a couple of photos I took last summer of an old gasworks.

Then I used one of my favourite 'tools' - I cropped and enlarged small sections from the photo and pinned the results up. And I got that wonderful tingly feeling! I don't know what size the finished pieces will be or how I will apply the foreground but I do know what I'm going to be spending the next few months doing.

Plan B .....

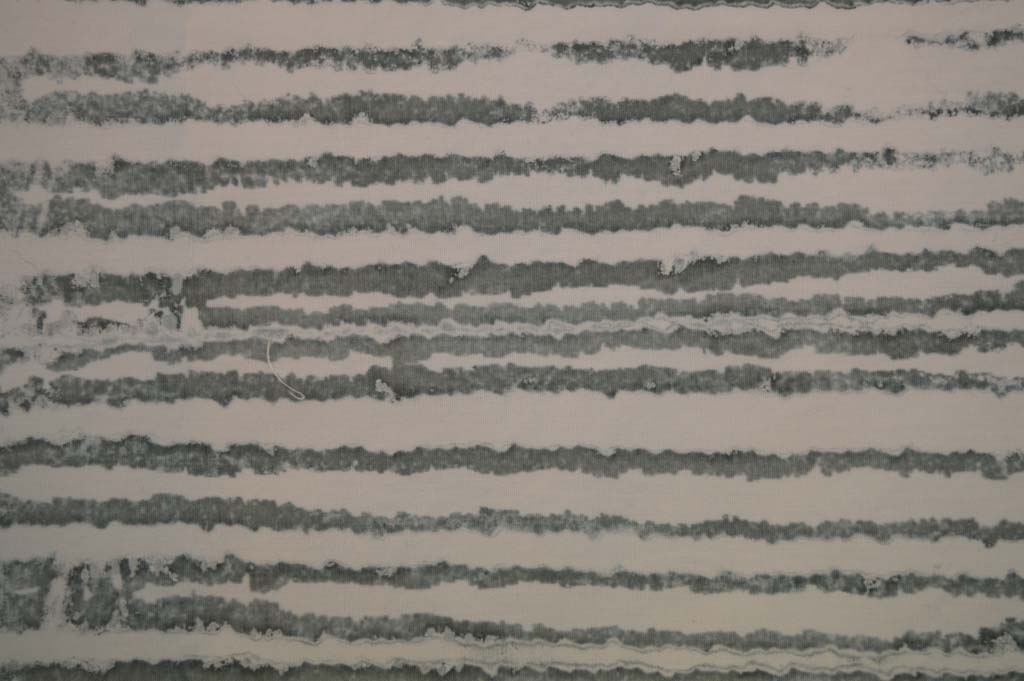
In between wrapping presents last week I did manage to prepare and pull some breakdown screens. I got some really promising marks by using a screen made with torn strips of freezer paper gently ironed onto the screen before rollering on a very thin layer of black thickened dye. I also made a screen using strips of torn masking tape. I wanted the marks to be delicate so pulled through with lots of print paste. And replaced the paste if it got tinted with colour.

However those lovely marks only appeared from the first and sometimes second pull. After that everything went 'blobby' and not at all what I wanted.

I have found before that I get the best marks and the most 'pulls' when I dry breakdown screens outside on warm sunny days. Drying out screens quickly and thoroughly is not easy in the winter. I have tried drying this batch of screens next to and above radiators and I still only get one good pull. Trying to develop a new palette of textiles based on this low success rate could be really frustrating! Luckily I am not working to a deadline so, although Plan B looks to be a good one I am putting it on hold until spring. I wonder if Santa can bring me an early spring?

Failed beginnings

It is a good job that I have a Plan B as my experiments over the last week or so have failed to give me a 'WOW' moment. The results didn't even fall into the 'Ugly Duckling' category of pieces that might fit in with what I'm trying to achieve with some additional process. The experiment has been educational but not in any way that is connected with what I think I'm trying to achieve.

I started with 8 pieces of cotton each 'marked' with a different medium. It turns out that my water resistant acrylic ink didn't put up much of a fight and washed out when put in the soda bath to soak. The soda solution was a beautiful turquoise colour as I poured it down the drain. Luckily (sic) the colour washed out so sucessfully that I can reuse the piece of cloth. The remaining seven, soda soaked and dried pieces were pinned to the bench and a layer of colour added using an open silkscreen.

After batching them I washed and dried the pieces. The original marks were all clearly visible below the layer of colour. The lines I had made with dilute acrylic and with acrylic mixed with Golden Matt Medium looked a little faded and fuzzy but the rest appeared unchanged. I then stripped out the colour using two methods. One half of each piece of cloth was discharged using Formosol mixed with print paste and applied through a screen. The other half was discharged using the cheapest bleach I could find (40p for 2 litres - bargain!) and a fan brush.

The Formosol discharged to a fairly consistent colour irrespective of the original colour. The bleach gave a bit more variation and also some different colours. Neither method affected the original marks. Hmm ... I had been hoping for some really interesting chemistry to happen that maybe striped back or somehow changed the first layer of marks. Instead discharging added colours to the fabric pieces that created a palette that reminded me of street lights glowing in the dark. Which has got me thinking about something else ... maybe the beginning of something else? So the pieces will be hung on a small design wall to contemplate whilst I move on to Plan B!

Take one blank canvas ....


Having worked on the colour family for what I hope will be my new series I need to start creating a palette of fabrics. Where to start? I started by clearing a design wall and moving everything off my 3.5m long print table. I don't do sketchbooks so this is my equivalent of that blank first page. Scary.

Time for a cup of coffee and a think. I want to experiment with building layers. Marks or text being the first layer. Colour (from the new colourway) being the second layer. Then marks or text being etched back into the colour using a discharge process. Thus revealing some of the original marks or text. Sounds simple but there are so many ways of achieving this. Being a list person I went through all my cupboards and pulled out all the different materials that could be used to mark cloth and wrote a long list of all the different ways they could be used - for example using acrylic, acrylic mixed with water, acrylic mixed with fabric medium, acrylic mixed with matt medium ... you get the picture. I cut decent sized pieces of cotton, pinned them to the bench and started.

Having not touched some of the materials in years I guess that I shouldn't have been surprised by how much stuff had dried out and how many containers I could only get into by cutting off the lid! My big long list got a lot shorter!

I am not bothered about the types of marks or even the colour of the marks as I'm pretty sure that most of what I produce over the next few weeks will end up in the bin. I am really looking at how different materials interact. After a pleasant couple of hours I have my first set of 8 different starting layers. Some will need fixing which I will do tomorrow then they will need soda soaking and drying ready for the second layer. It wasn't so scary after all.